
How To Draw A Clock Step By Step
Let’s dive into a fun tutorial on how to draw a clock using simple shapes!
Even though we don’t see many traditional clocks around these days, knowing how to read them is pretty cool.
Plus, drawing one is a great way to practice.
By the end of this tutorial, you’ll be a little better at telling time and drawing.

You might find drawing other things like a bright golden key, a sturdy hammer, or a quirky mason jar fun, too!
Supplies You’ll Need
- Blank piece of paper
- Pencil
- Eraser
- Pencil sharpener
-It’s a good idea to keep a couple of sheets of paper on hand in case you want to start over.
I also recommend using a white eraser instead of a pink one because it doesn’t leave red marks on your paper.
Step-By-Step Guide To Draw A Clock with an Alarm

Step 1. Draw The Clock’s Body

Start by drawing a big circle. It’s the center of your clock, so try to make it as round as possible.
A neat trick is to trace around the bottom of a glass.
Step 2. Add The Face
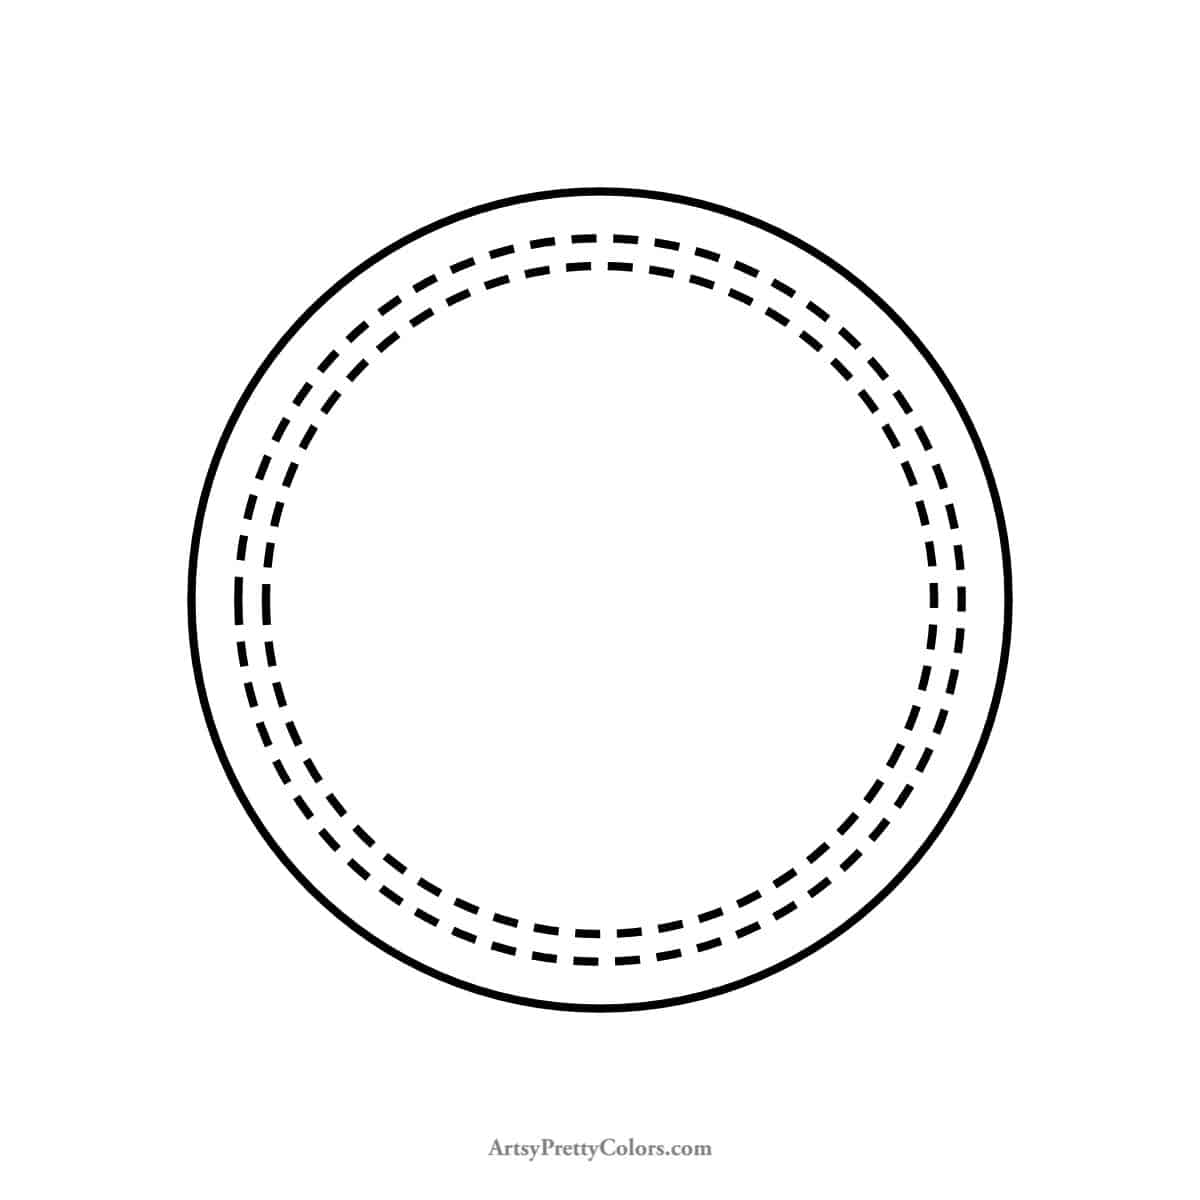
Draw two more circles for the clock’s face inside your big circle. Then, sketch the hands.
You can set them to show any time you fancy!
Remember, the second hand is the longest, followed by the minute hand, and the hour hand is a bit shorter.
Step 3. Draw The Hands

Oops! Looks like we got a little ahead of ourselves in Step 2. So, you already know the drill: long second hand, shorter minute hand, and an even shorter hour hand.
Straight lines will do the trick!
Step 4. Create Details In The Hand’s
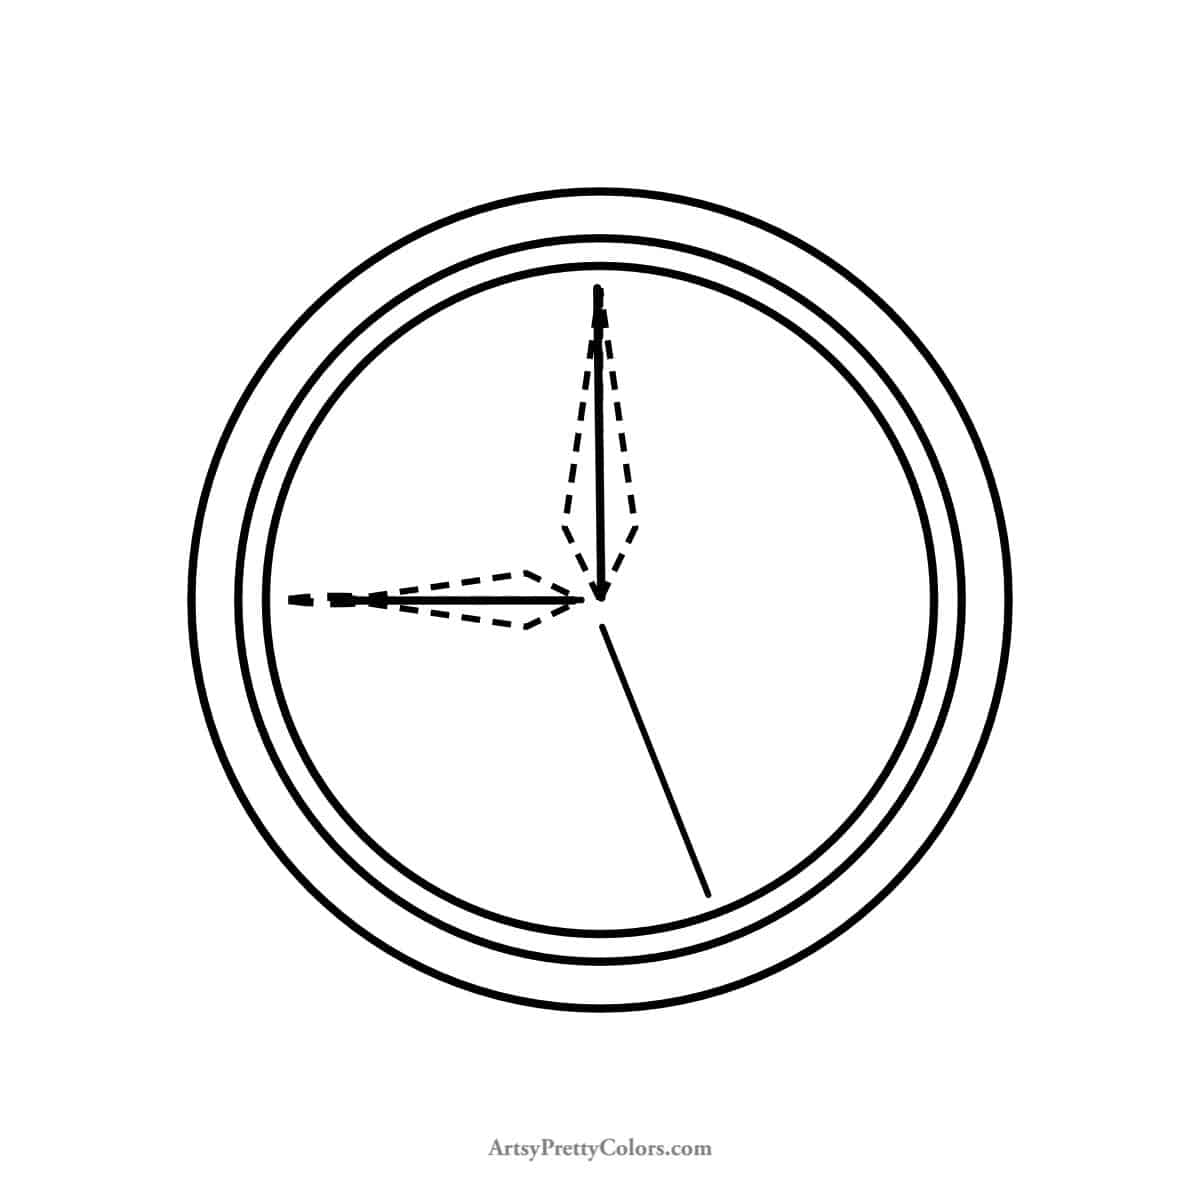
Now, let’s jazz up those clock hands. Add little V-shapes at the ends pointing towards where the numbers would be.
Then, draw lines coming back to the center.
Step 5. Add The Numbers

Instead of numbers, we’re drawing lines where they’d usually go.
Make the lines for 12, 3, 6, and 9 a bit longer than the others.
Step 6. Sketch The Feet

Our clock needs to stand on something, right?
Draw two lines at the bottom for feet, slightly angled and joined by a rounded line.
Step 7. Add The Arms

Now, for the alarm part. Draw two long rectangles with curved ends on the top. These are your alarm arms.
Step 8. Draw The Clock’s Alarm Bells

For the bells, add half-circles on top of each arm, with a little line at the bottom.
They should look like they’re sitting snugly in the middle of the arms.
Step 9. Add Caps To The Arms
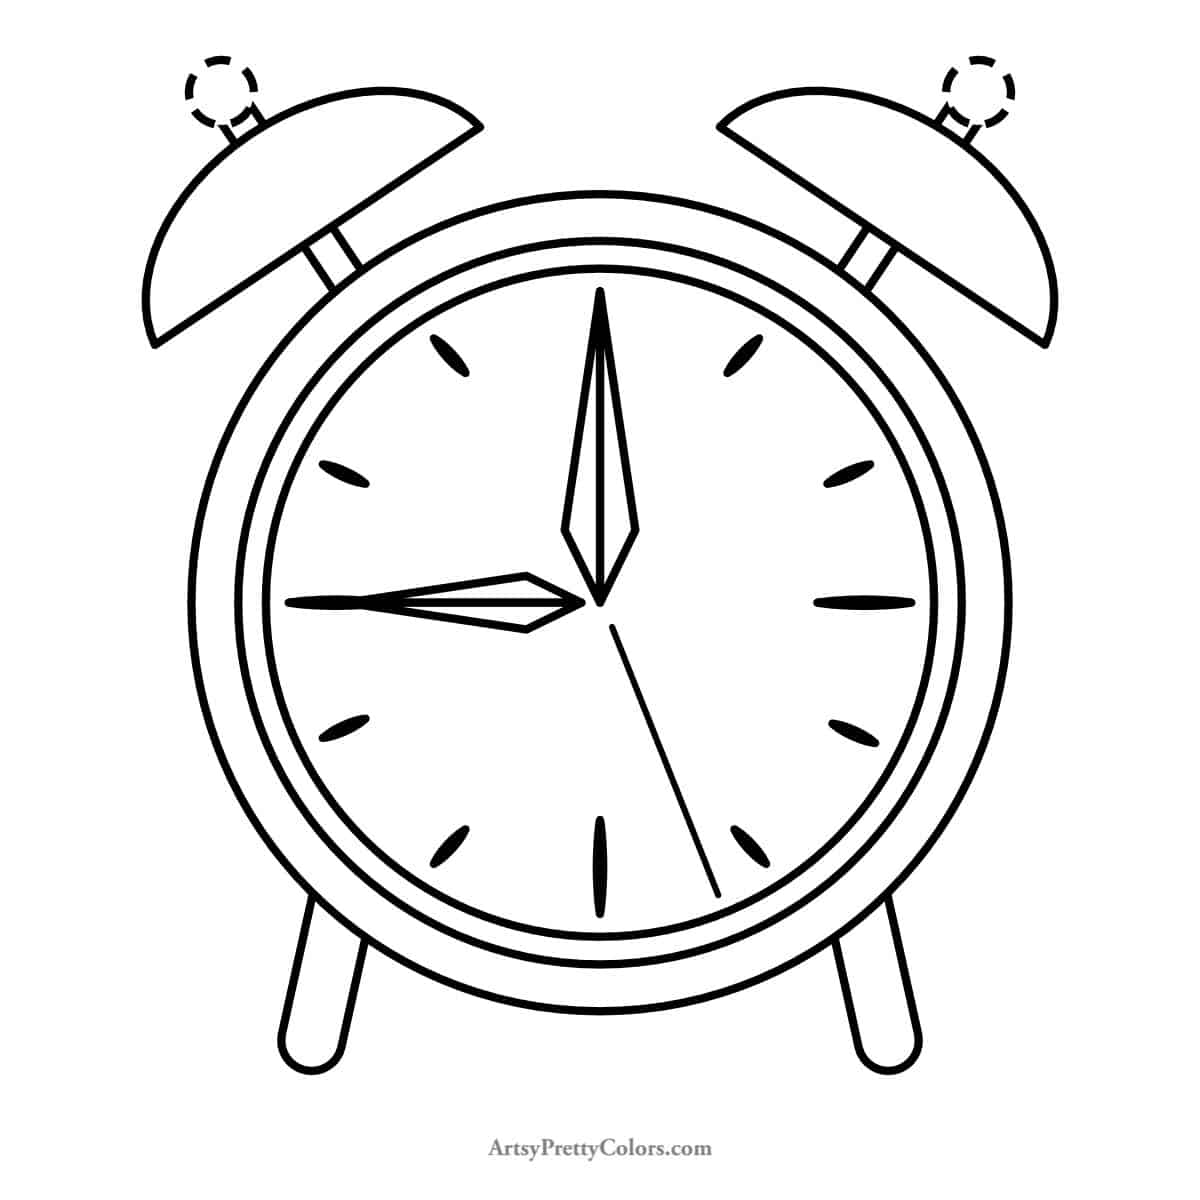
First, erase any lines inside your bells.
Then, pop a circle on top of each arm, making sure it’s a tad wider, and connect them with a straight line at the bottom.
Step 10. Optional- Add Finishing Touches
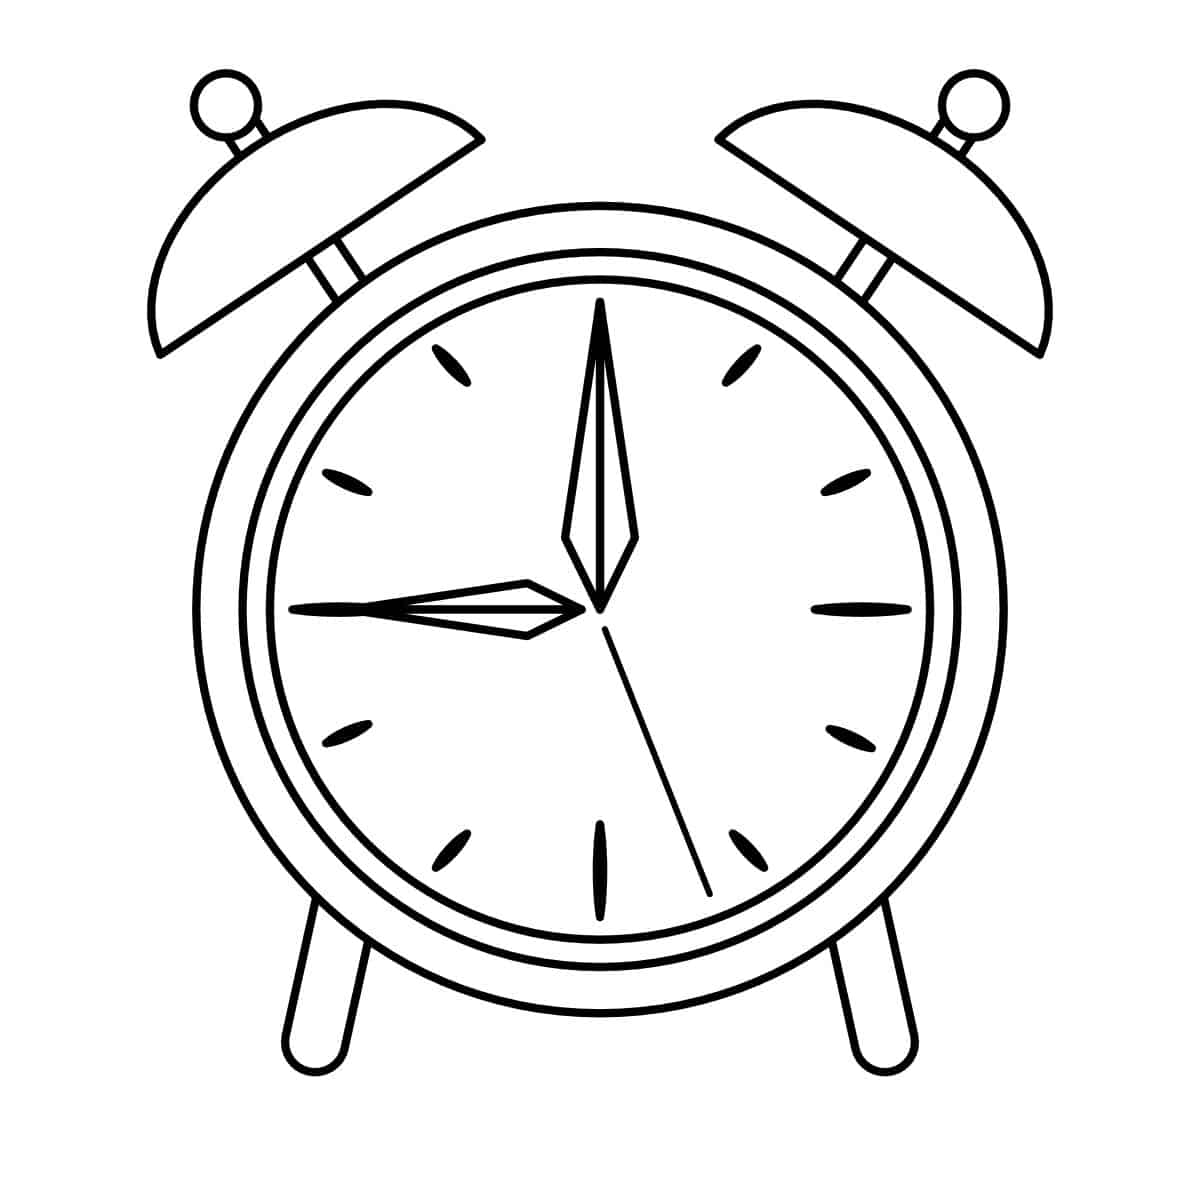
Now for the fun part! Color in your clock.
Maybe make it glow-in-the-dark green, or use the colors from our reference. Or get creative with a rainbow of colors!
If you had a good time with this, there’s more fun to be had with drawing a banner ribbon.
Keep practicing, and you’ll be amazed at what you can create!
Don’t forget to Pin it for later!

How To Draw A Clock Step By Step
A step by step guide for how to draw a clock using basic shapes. A quick and easy tutorial.
Materials
- Blank piece of paper
- Pencil
- Eraser
- Pencil sharpener
Tools
- Please see the full materials list above the tutorial for details and links.
Instructions
- Draw A Large Circle To Make The Body
- Add The Clock Face With Two Concentric Circles
- Draw The Hands With Three Straight Lines
- Create The Details For The Hands
- Add The Numbers With Short And Long Lines
- Draw The Feet Of The Angle To Each Side
- Add The Alarm Clock Arms At The Top
- Draw The Alarm Bells On The Arms
- Add The Caps To The Arms With Little Circles
- Optional- Add Finishing Touches