
How To Draw An Owl –Step By Step Tutorial
Discover the fun and simplicity of drawing an owl with our easy-to-follow guide.
Today, we’ll walk you through the process of creating this beautiful bird using basic shapes.
Surprisingly, owls are among the easiest animals to sketch due to their symmetrical structure and predominantly flat faces.
This concise tutorial will quickly elevate your skills, making you a master owl artist in no time.
Owls happen to be one of my favorite birds, sand there are many different species.

In this tutorial, we’re focusing on the majestic Great Horned Owl. You might also be familiar with other species like Barn Owls, Barred Owls, and Snowy Owls.
For more interesting tidbits about this nocturnal creature, be sure to check out the additional information at the bottom of this page.
Let’s gather a few basic supplies and begin creating your charming owl drawing.
You might also enjoy our tutorials for drawing a butterfly, charming mosquito, and a cute frog.
Supplies You’ll Need
- Sheet of paper
- Pencil
- Pencil sharpener
- Eraser
Optional Materials
- Markers
- Colored pencils
- Crayons
Step-By-Step Guide For How To Draw An Owl

Step 1. Sketch The Body

Begin by drawing a large oval. This forms the body of the owl.
Step 2. Craft The Wings

Add a curved line on each side of the body to represent the wings. These lines should curve in opposite directions.
Step 3. Outline The Facial Disks and Eyes
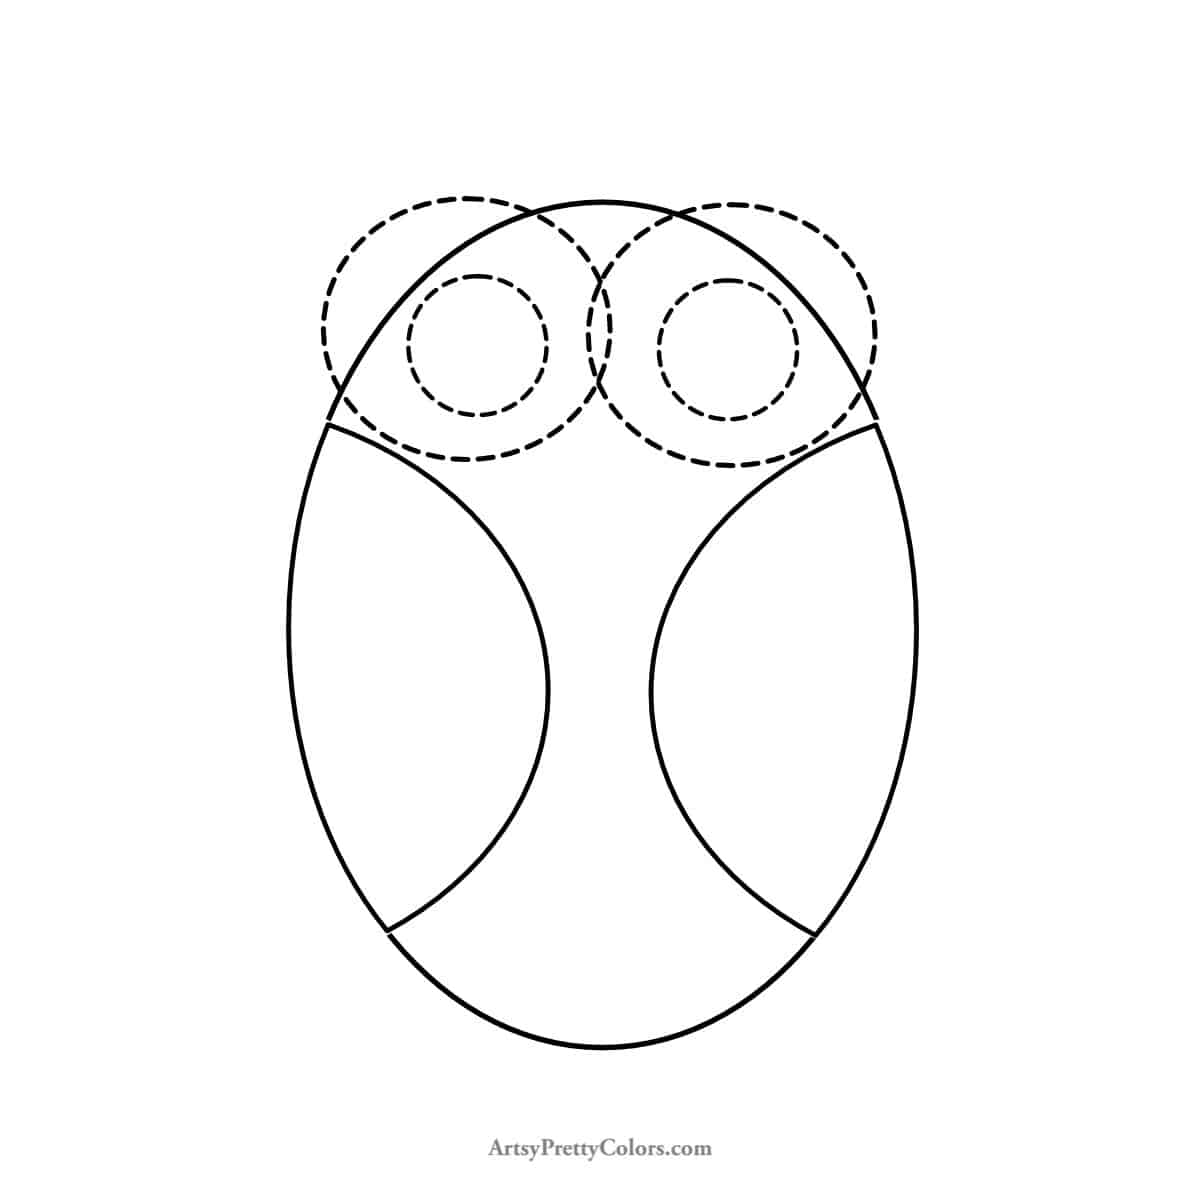
Draw large circles for the facial disks that surround the eyes. These circles should overlap slightly at the center, extending above the wings and past the sides of the head.
Inside each facial disk, draw a smaller circle for the pupil. Position these pupils off-center, closer together, and slightly lower than the midpoint.
Step 4. Add The Ear Tufts
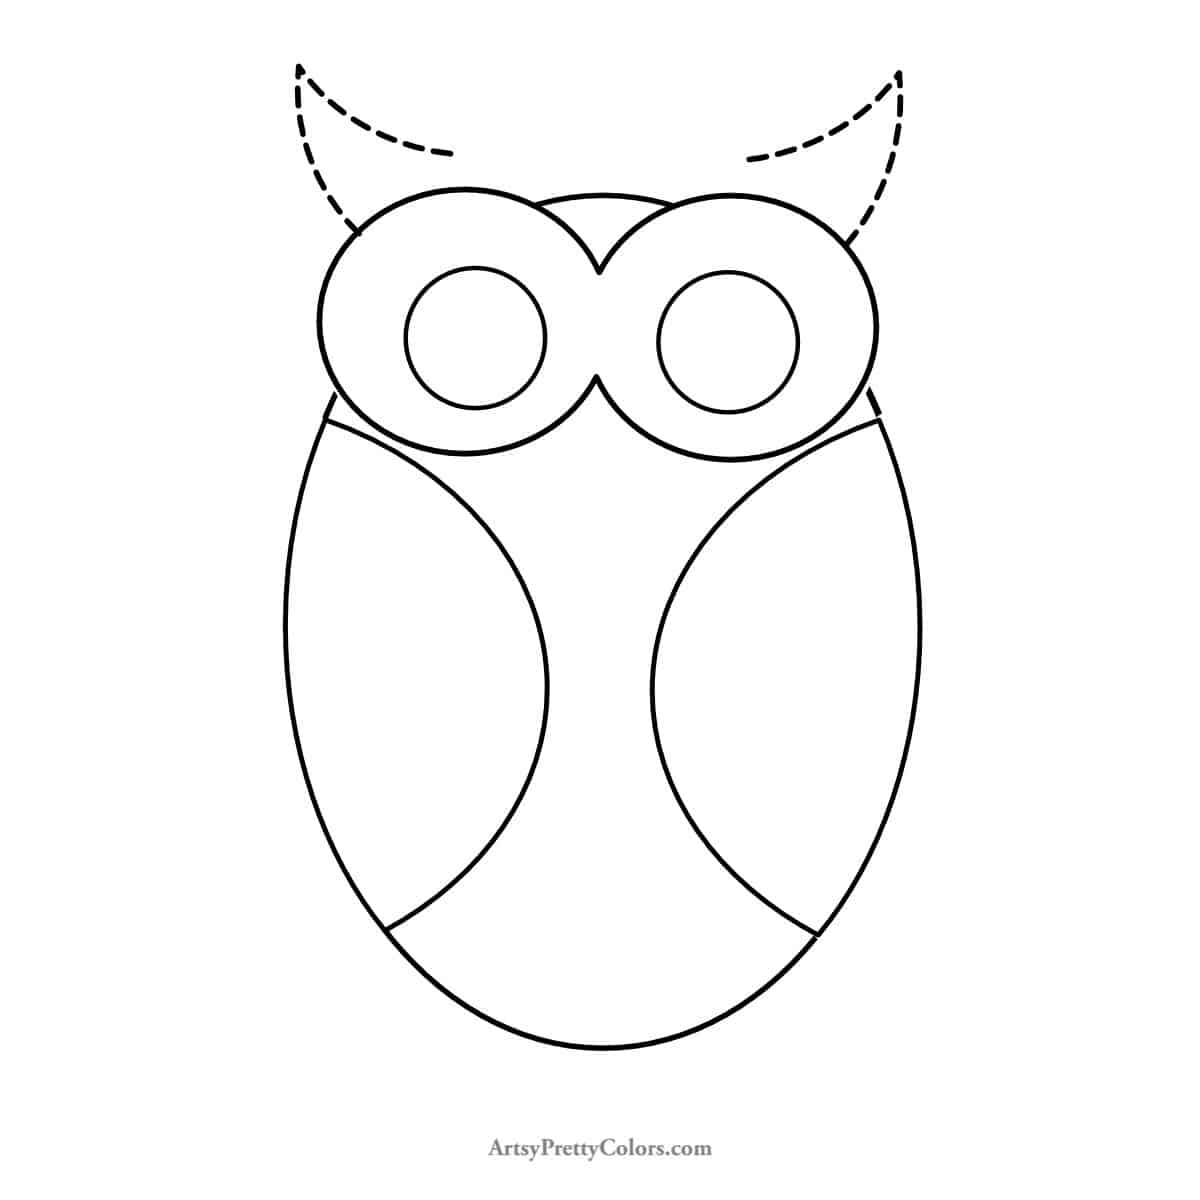
Erase any overlapping lines from the facial disks. Then, draw the ear tufts with diagonal, curved lines starting halfway between each eye.
Remember to leave space at the top for the owl’s head.
Step 5. Complete The Head and Draw The Feet

Connect the inner ear tufts with a curved line to form the top of the head.
For the feet, draw two angled, wide rectangles at the body’s base. Then end them with downward-pointing triangles.
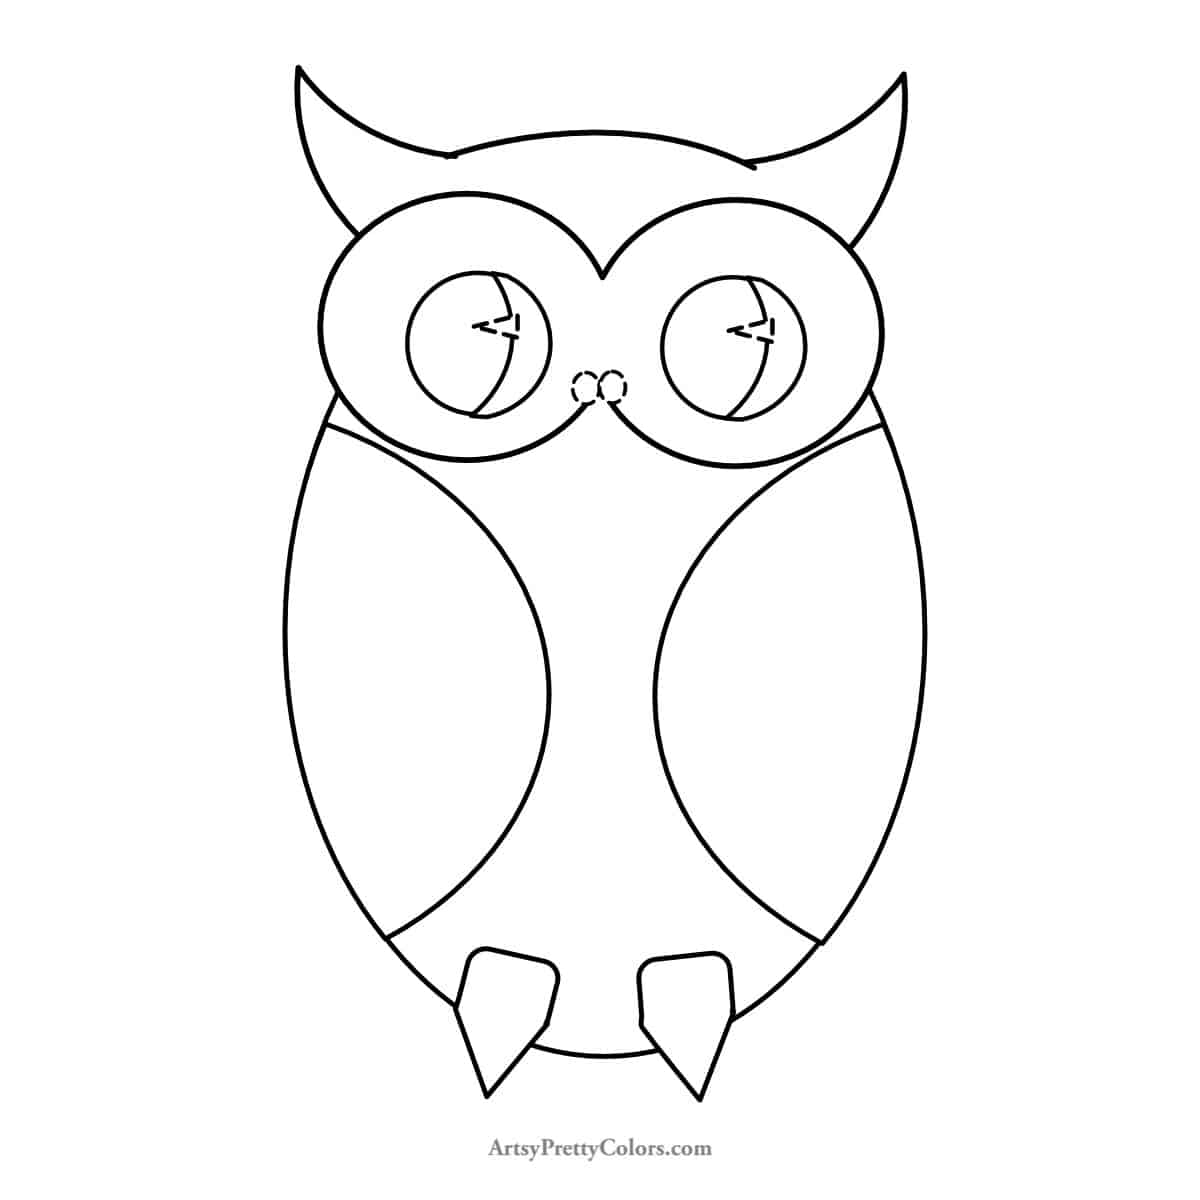
Step 6. Add Inner Pupils

First erase the pencil lines inside the feet.
Now, inside of his wide eyes, add part of the pupil. This will be a crescent shape that gives the owl the appearance of looking to the left.
Just draw a slim curve on the right side of each smaller circle.
Step 7. Finish The Eye Details And Start The Beak
Inside each crescent, add a small triangle, pointing left. This adds character to the eyes.
Start the beak by drawing two small circles at the center of the lower facial disk.
Step 8. Finish The Beak To Shape The Face

Add a small triangular beak, with a slight curve toward one side.
Step 9. Add Final Touches To The Cute Owl
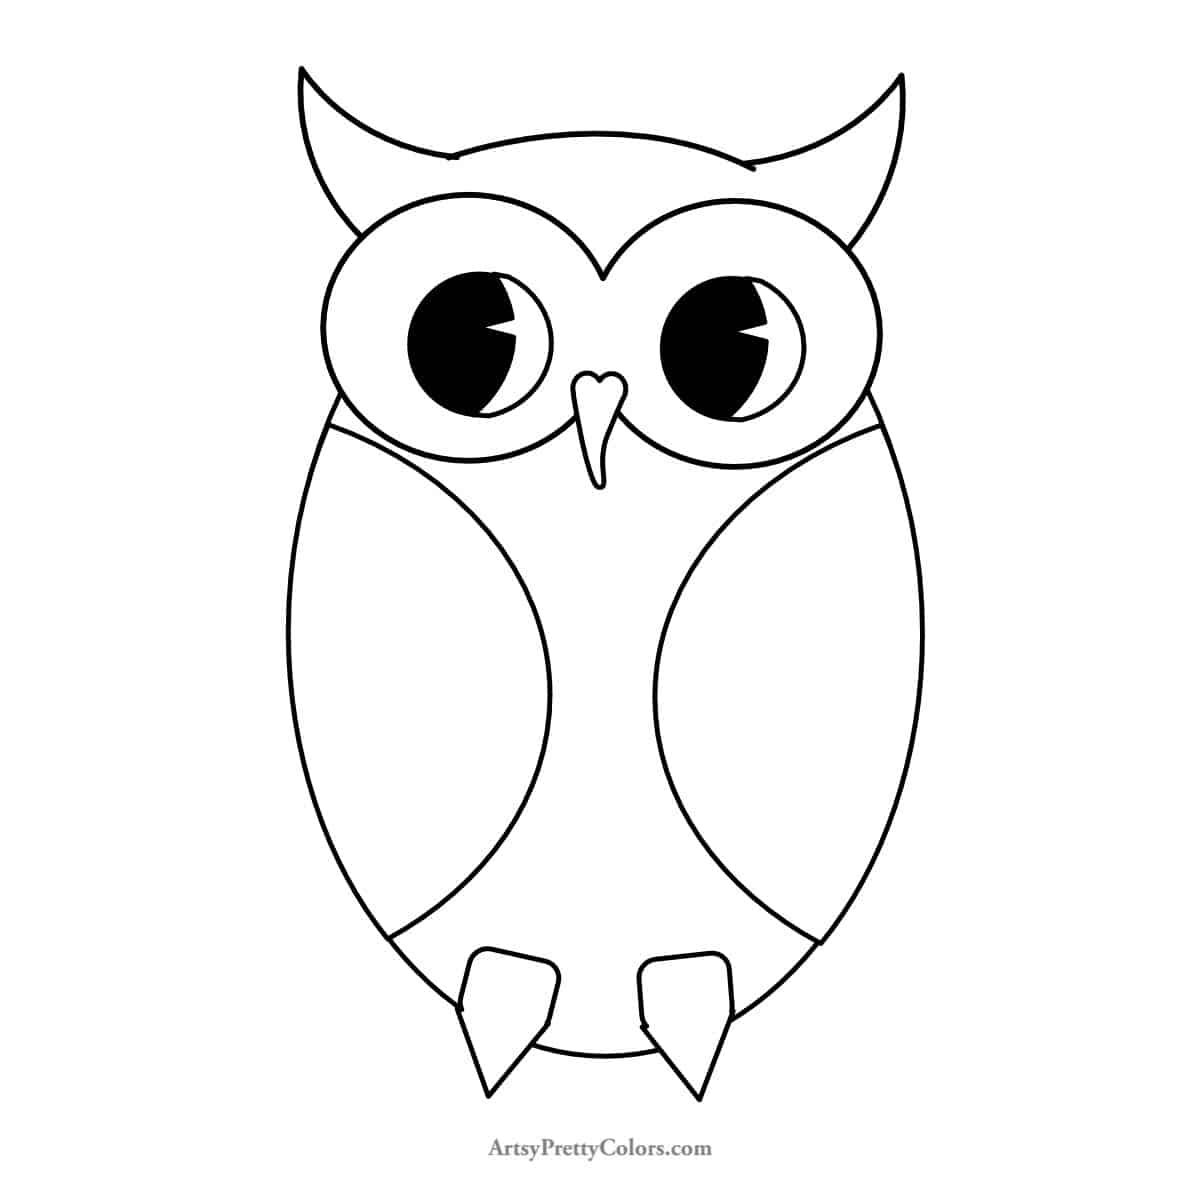
Now if you wish you can color in the owl. Add color to the iris in his nice round eyes to give them some contrast.
You can use realistic colors like the one in the reference image, or use different colors that are bright and bold.
And to add some texture, you can add short lines to give him fluffy feathers on his ear tufts, or hatch marks on his wings to create layers of feathers.
And there you have it – your very own drawing of an owl, brought to life with a few simple steps!
Cool Facts About Owls
Did you know owls can’t move their eyes! They can only move their heads, which is why they can rotate them so far around.
And owls have a binocular-like vision that allows them to focus at very long distances, but they have blurry vision up close.
Many owls appear to have prominent ears, but it’s the big tufts of hair or feathers that surround the ear that you see. These tufts help funnel the sound into the ear.
In Greek mythology, an owl always accompanies Athena, the goddess of wisdom. The owl is a symbol of wisdom in many cultures.
Don’t forget to Pin it for later!

How To Draw An Owl –Step By Step Tutorial
Learn how to draw an owl in this step by step tutorial. A simple drawing lesson that shows you how to use basic shapes to create an owl drawing.
Materials
- Sheet of paper
- Pencil
- Pencil sharpener
- Eraser
Tools
- Please see the full materials list above the tutorial for details and links.
Instructions
- Draw An Oval To Make The Bird's Body
- Make The Wings For With Two Lines Curved Outward
- Draw The Facials Disks and Eyes Using Two Big Circles and Two Small Circles
- Draw The Ear Tufts
- Finish The Head and Draw The Feet Using A Square With A Triangle Connected
- Add A Curved Line To Make Pupils For The Owl’s Eyes
- Draw The Eye Details Using A Triangle And Start The Beak
- Finish The Beak With A Downward Facing Triangle To Shape The Face
- Add Finishing Touches To The Cute Owl