
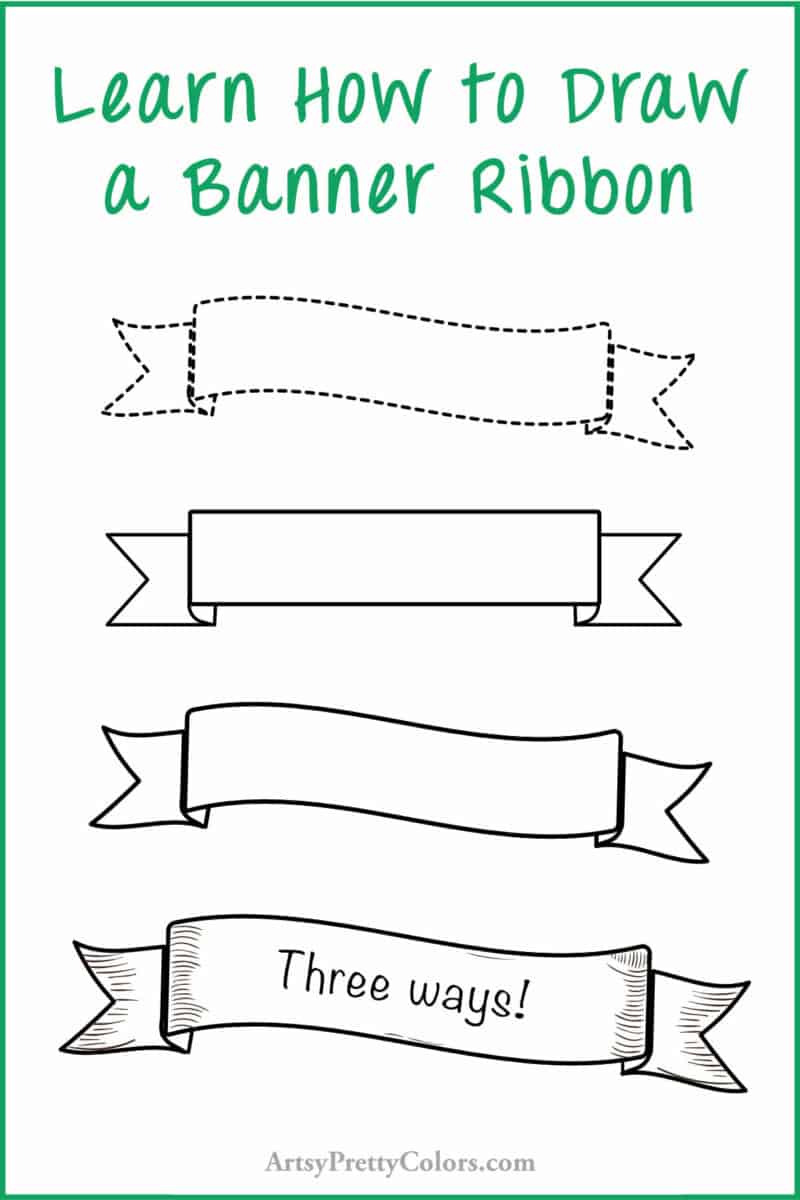
How To Draw A Banner Ribbon (Straight & Wavy)
Let us show you today how to draw a banner ribbon in a fun and simple way for young artists!
We’ll explore how to craft both a straight and a wavy banner ribbon, then a we’ll show you a quick trick for how to turn them into vintage pieces by the end.
Before diving into the drawing process, did you know that banners have been used throughout history to represent groups or convey messages?

They come in various shapes, including curvy, wavy, and even double designs. Today, we’ll focus on creating both a straight and wavy ribbon.
If you’re keen on other drawing adventures, why not explore how to sketch a Mason jar or a house key after mastering your ribbons?
Supplies You’ll Need
- Sheet of paper
- Pencil
- Eraser
- Pencil sharpener
Draw A Straight Banner Ribbon: A Step-By-Step Guide:

Step 1. Create The Center of The Banner

Begin by drawing two horizontal lines to outline the main body of your banner.
Step 2. Form The Sides

Close off your rectangle by adding two vertical lines at each end, making it look neat and tidy.
Step 3. Creating Ribbon Edges

At the ends of the banner, draw a line down from the middle, then a matching one across to form an ‘L’ shape, framing the banner’s edges.
Step 4. Add The Bottom Line

Sketch a straight line from the outer edge of each ‘L’ shape, extending slightly into the rectangle.
This detail starts to bring your banner to life.
Step 5. Make The V-Cut Shape
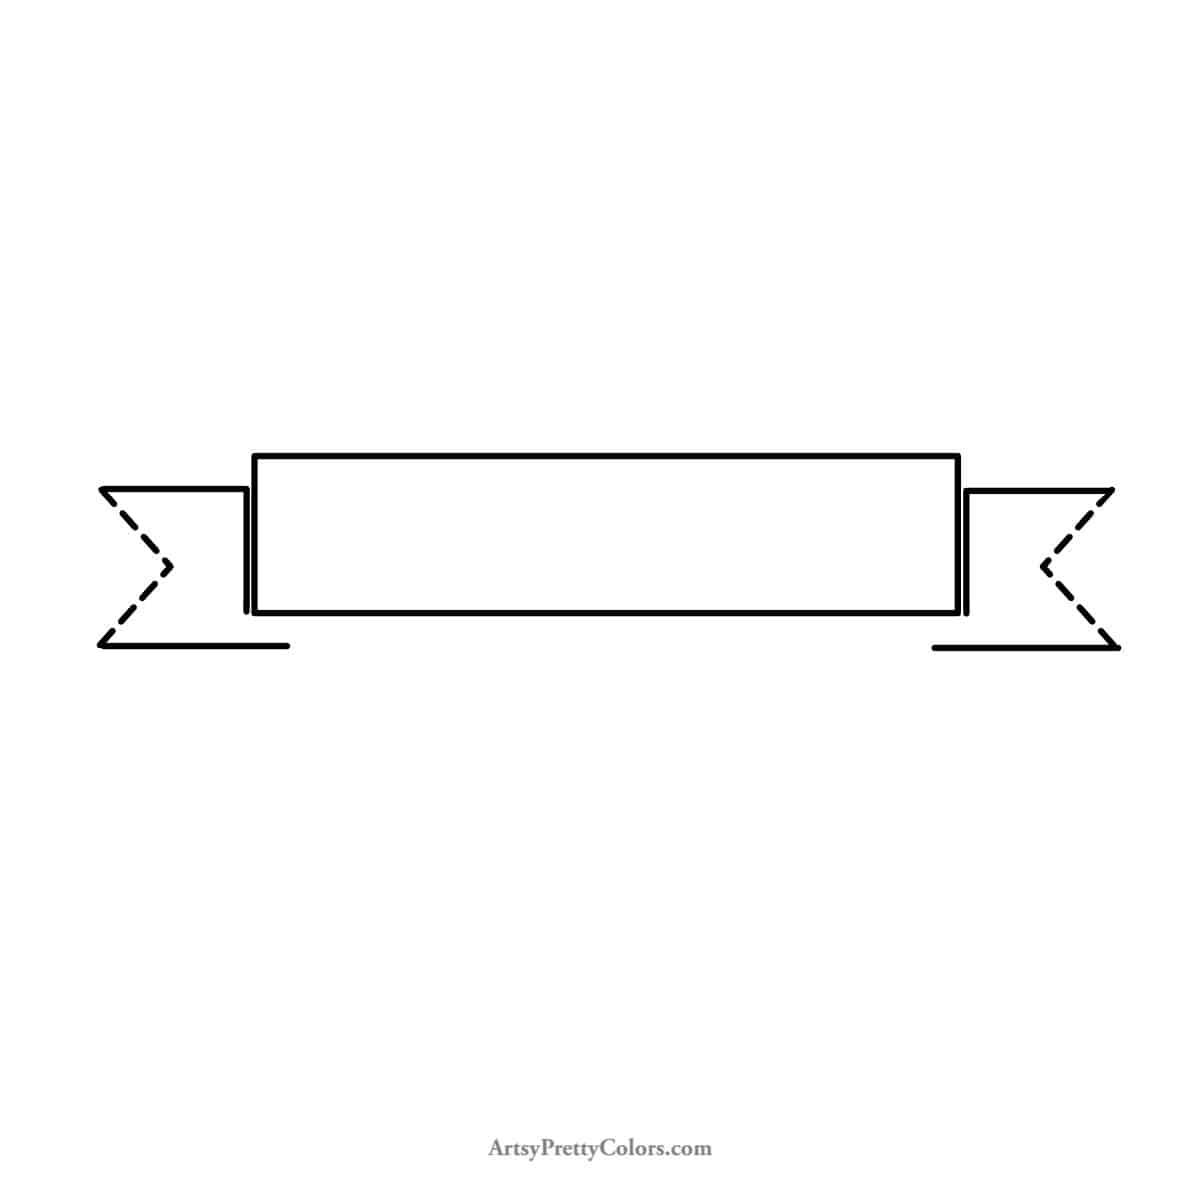
Connect the top and bottom lines of the banner’s edges with a diagonal line to form a sharp ‘V’.
This is where the ribbon looks like it’s fluttering.
Step 6. Connecting The Folds

Draw curved lines to link the rectangle to the ribbon’s edges, adding vertical lines to complete the fold. It’s like the ribbon is waving hello!
Step 7. Add Final Touches
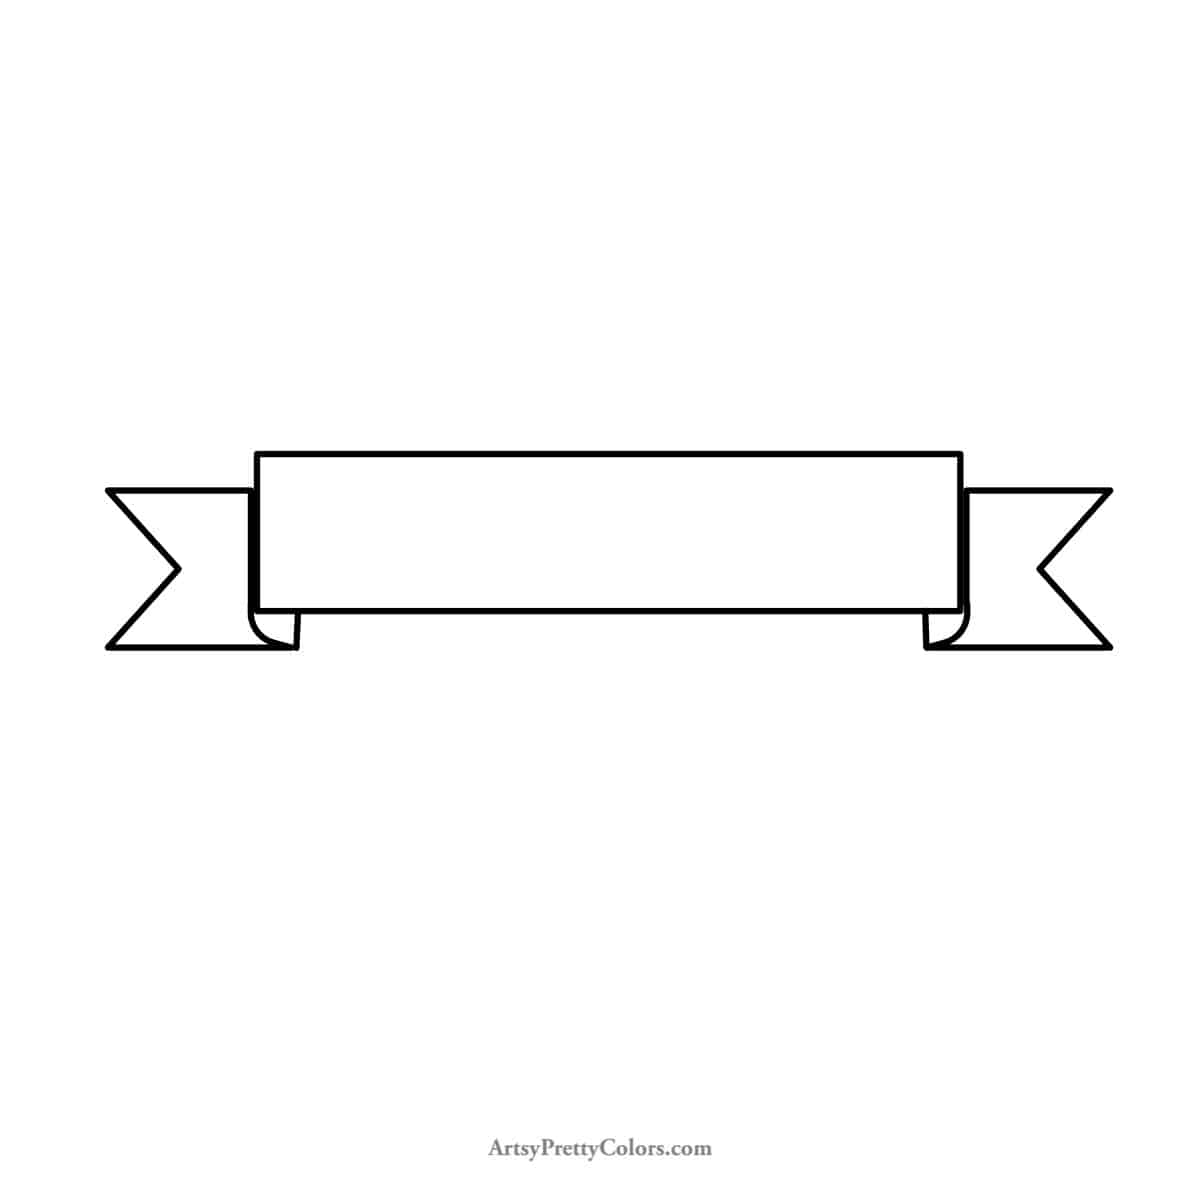
You can personalize your banner by coloring it or writing a name.
For a touch of history, we’ll later explore adding vintage details.
Create A Wavy Banner Ribbon
Let’s make waves.
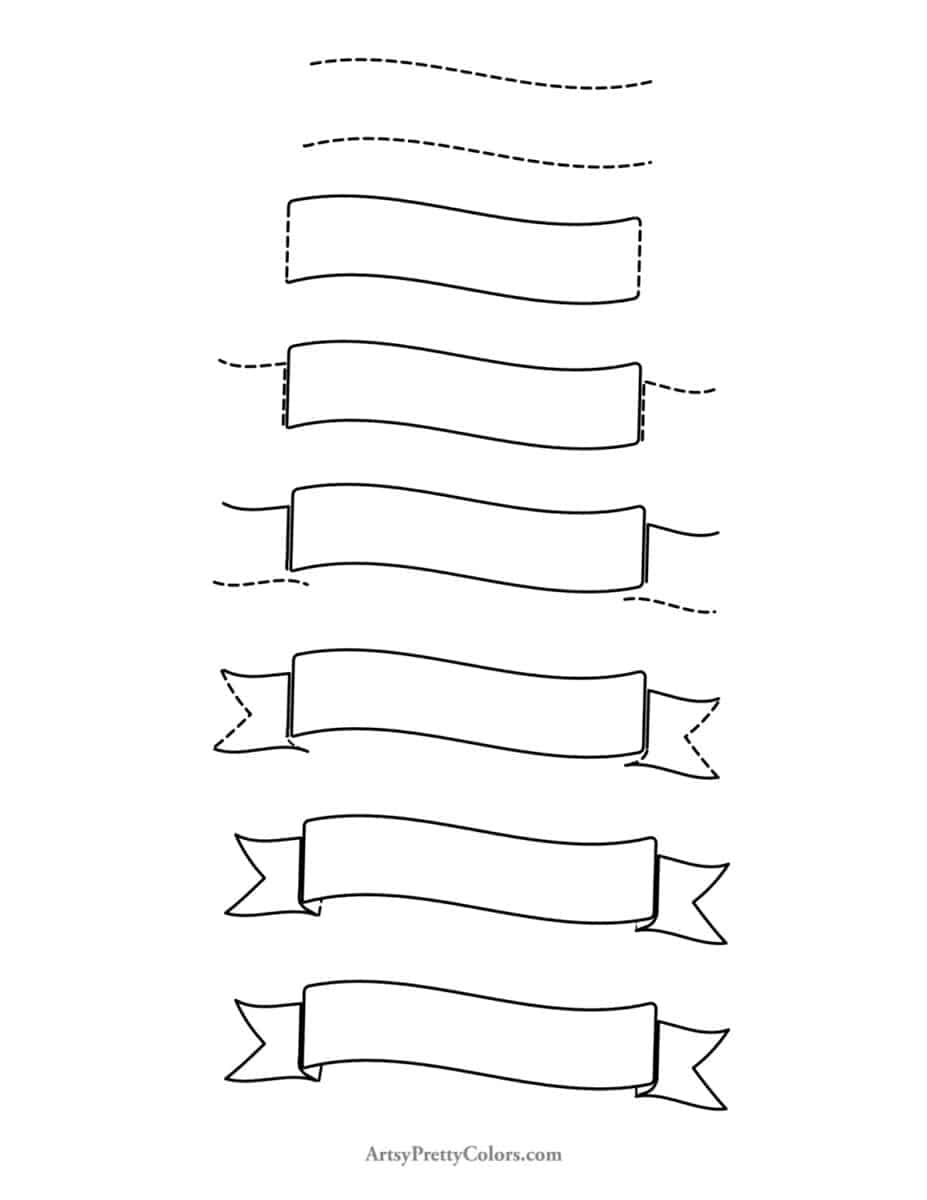
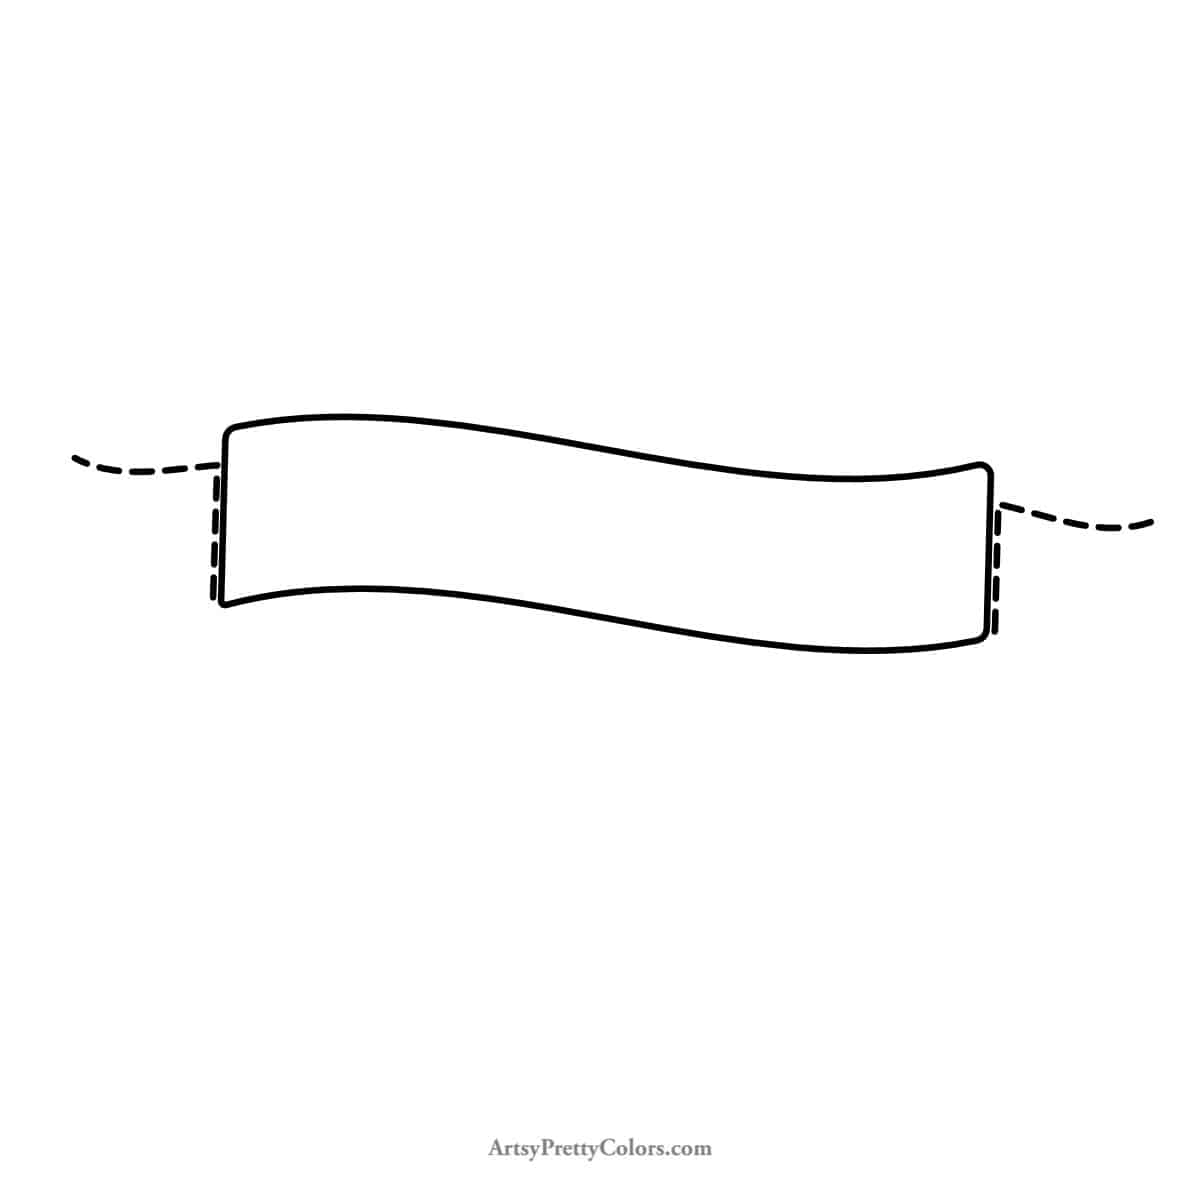
Step 1. Sketch The Wavy Shape

Mimic the motion of a gentle wave by drawing parallel lines that curve up and down, like the ocean’s rhythm.
Step 2. Complete The Main Body
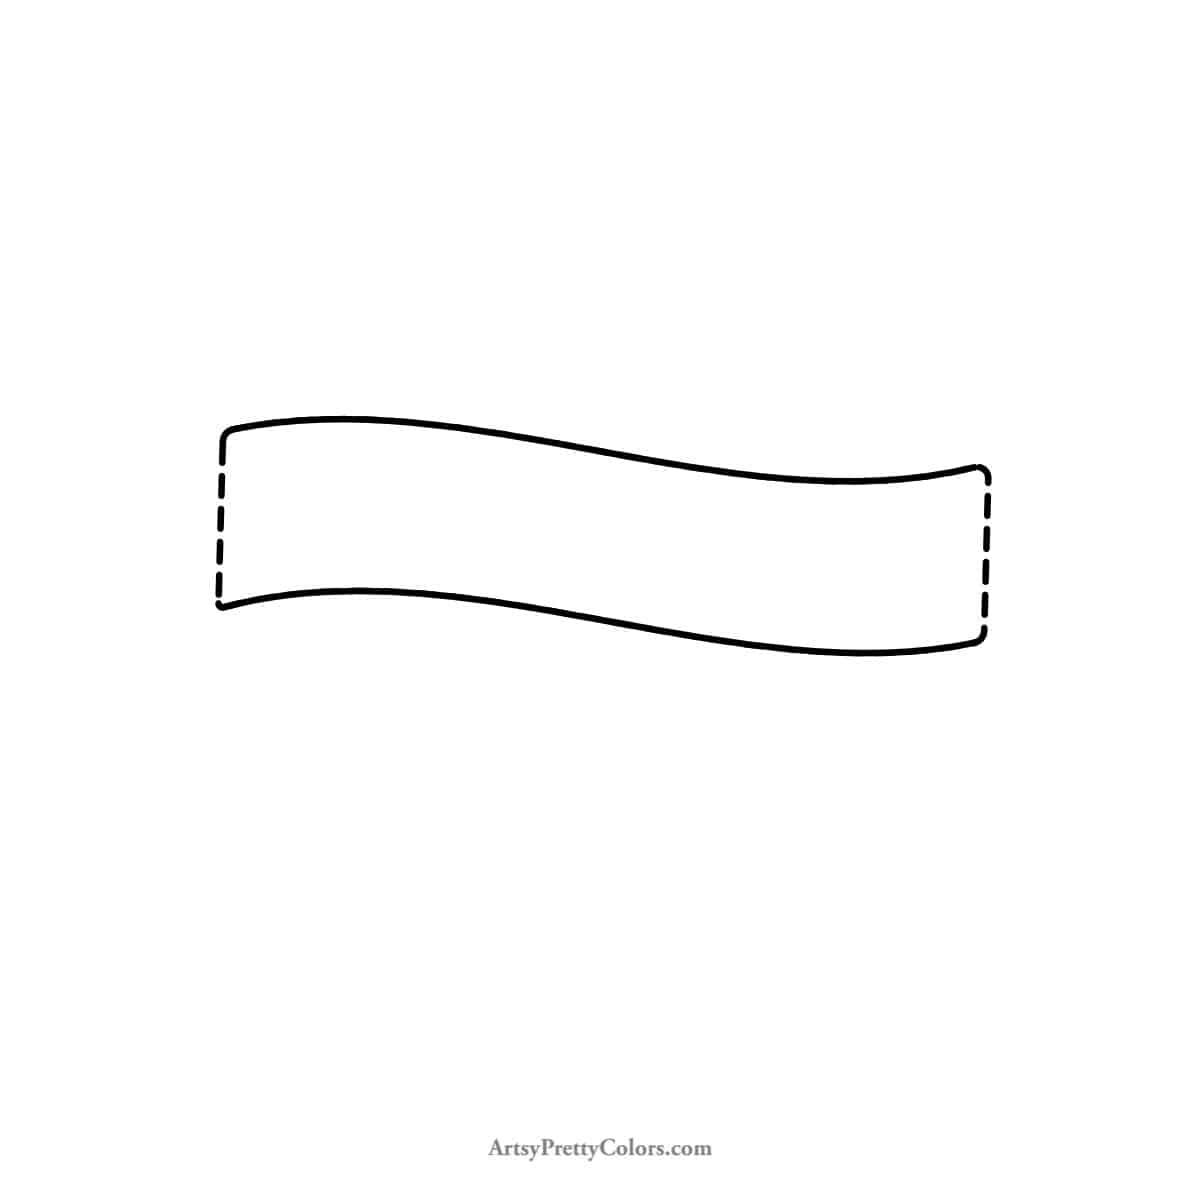
Add vertical lines to cap off the ends of your waves, softening the corners for a natural look.
Step 3. Shape The Edges
Begin the ribbon’s ends with an ‘L’ shape, pointing outwards, snug against the banner’s side.
Step 4. Draw The Bottom Edge

Sketch wavy lines below the rectangle to mirror the banner’s flow, starting and ending inside the rectangle.
Step 5. Finish The Ribbon’s Tail
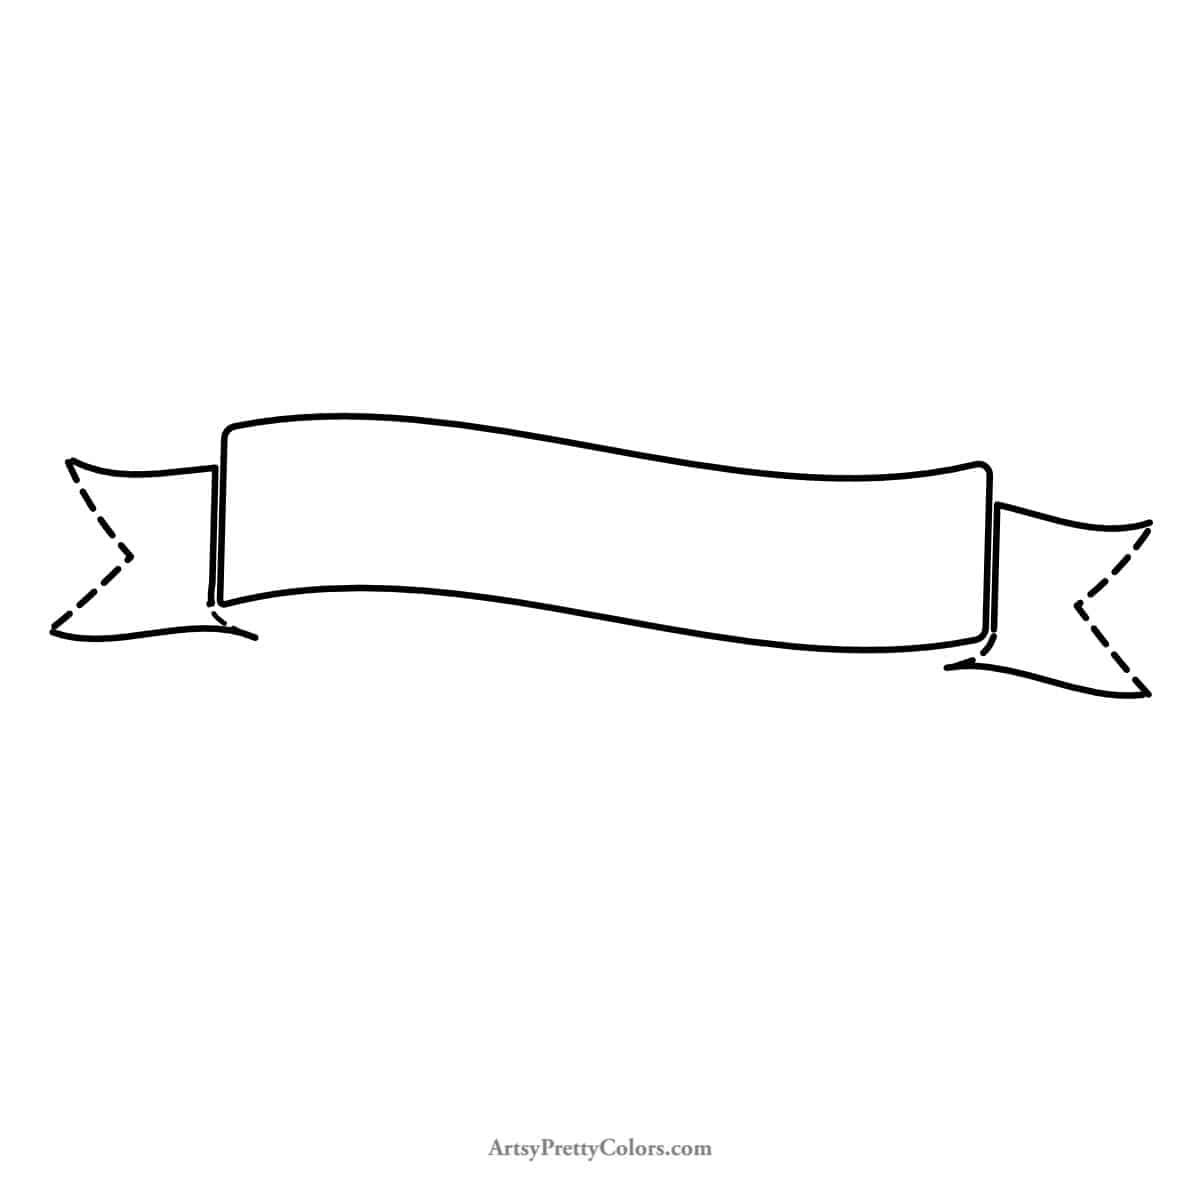
Connect the ‘L’ shape to the ribbon’s edge with a curved line, capturing the essence of movement.
Step 6. Make The Fold At The Edges

Add short lines from the edges to meet at the rectangle’s base, following the curve, like the ribbon is dancing.
Step 7. Add Finishing Touches To The Wavy Banner

Bring your banner to life with colors or add a name.

For a dash of nostalgia, add small, uneven lines at the ends and folds for a vintage ribbon feel.
Drawing is a beautiful way to express creativity and improve skills.
If you’re eager to learn more, and to further sharpen your artistry, check out our article on how to practice drawing.
Don’t forget to Pin it for later!
How To Draw A Banner Ribbon
This step by step tutorial will take you through the process showing how to make a straight and a wavy banner ribbon using basic shapes.
Materials
- pencil
- eraser
- pencil sharpener
- piece of paper
Tools
- Please see the full materials list above the tutorial for details and links.
Instructions
- Step-By-Step Guide For How To Draw A Banner Ribbon That Is Straight
- Create The Main Rectangle Of The Banner With Parallel Lines
- Add Sides By Drawing Two Vertical Lines
- Draw The Banner Edges And Start With An L-shape
- Add The Bottom Line Of The Ribbon Edge
- Draw The V-Cut Shape On The Edges
- Close The Folds Of The Ends With A Short Curved Line
- Add Final Details To The Banner Ribbon And Color It
Step-By-Step Guide For Drawing A Wavy Banner Ribbon - Draw The Basic Shape Of The Wavy Banner
- Finish The Main Part Of The Banner With Two Vertical Lines
- Draw The Edges As An L-shape
- Make The Bottom Of The Banner's Edge
- Complete The Ribbon's Tail With A V-shape
- Draw Two Short Curved Lines To Complete The Fold In The Ribbon’s Edges
- Add Finishing Touches To The Wavy Banner Ribbon And Color It Or Add Small Lines For A Vintage Feel