
How To Draw A Hammer Step By Step
Today, we’re going to learn how to draw a hammer.
Did you know hammers are one of the most handy tools you can find in any toolbox?
You can use them for a wide assortment of tasks.
They come in all sorts of shapes and sizes, and their handles are made from different materials.
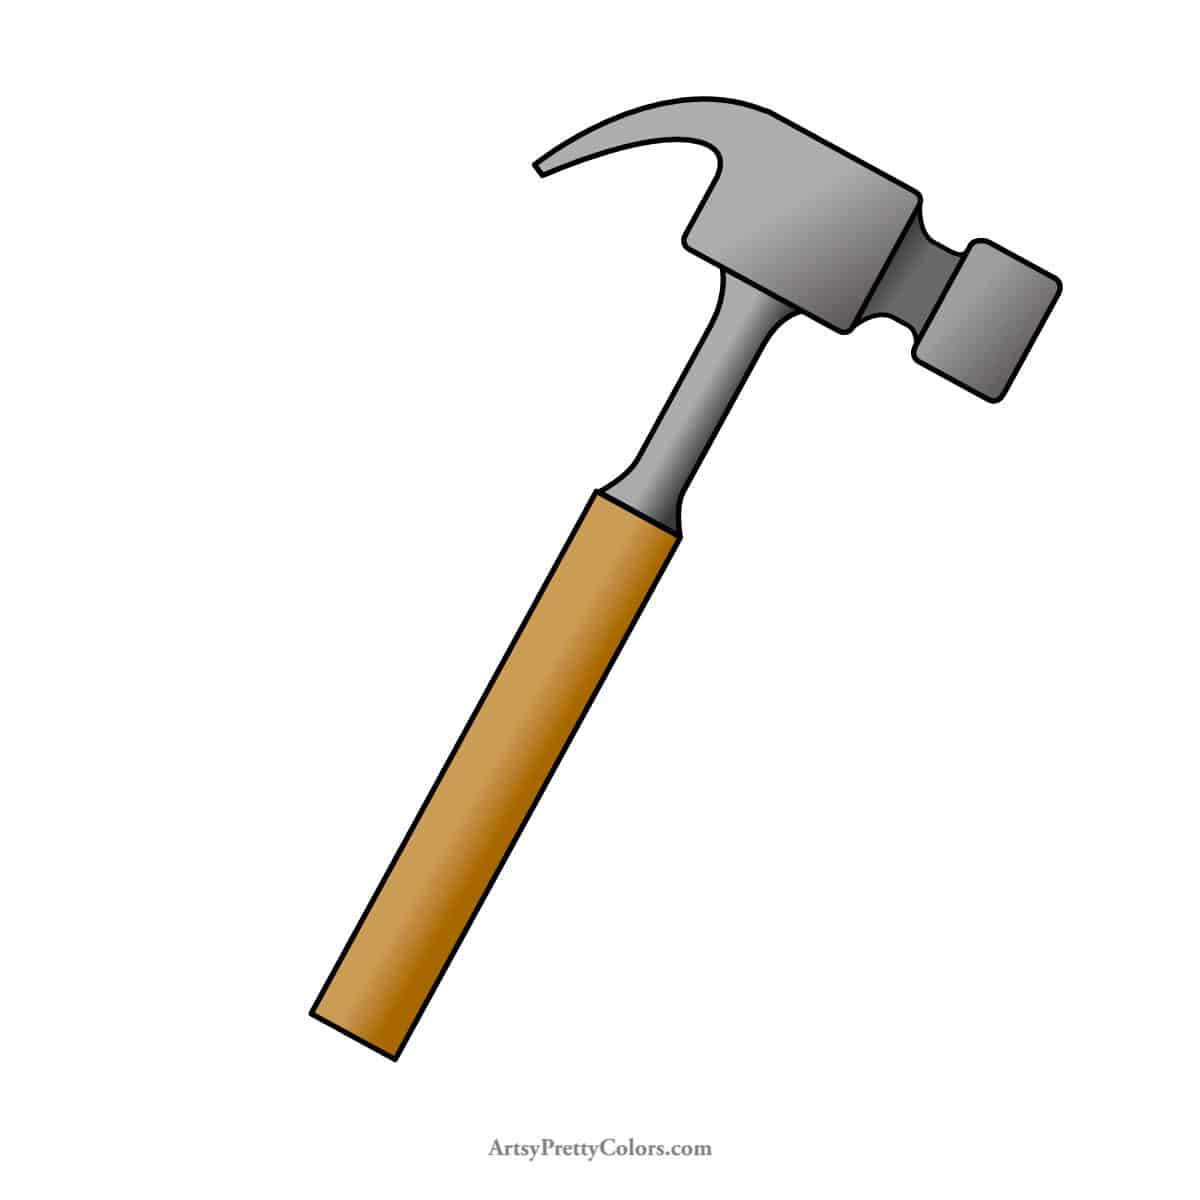
We’ll create a hammer with a wooden handle for our drawing project. Why wood, you ask?
Because adding the wooden texture at the end is super fun!
Before jumping in, let’s ensure we have everything we need. If you enjoy this, you can also draw a shiny house key or a crystal-clear glass jar next.
Drawing Supplies You’ll Need
- Sheet of paper
- Pencil
- Eraser
- Pencil sharpener
Optional Materials
- Crayons
- Markers
- Colored pencils
Let’s Draw a Hammer Step by Step!

Step 1. Draw The Handle’s End

Start by drawing a rectangle. This will be the bottom part of your hammer’s handle.
Step 2. Make The Handle’s Top

Our hammer’s handle is made of two parts. You’ve just drawn the wooden grip. Now, let’s draw the metal part that’s a bit thinner.
Draw two parallel lines above the grip, slightly narrower, and cap it off with a straight line across the top.
Step 3. The Hammer’s Head

Connect a rectangle to the top of the handle. This is the base of the hammer’s head, where all the action happens!.
Step 4. The Neck

Now, draw a small rectangle on the right side of the head’s base. This is the neck of the hammer’s head.
Step 5. Make The Face
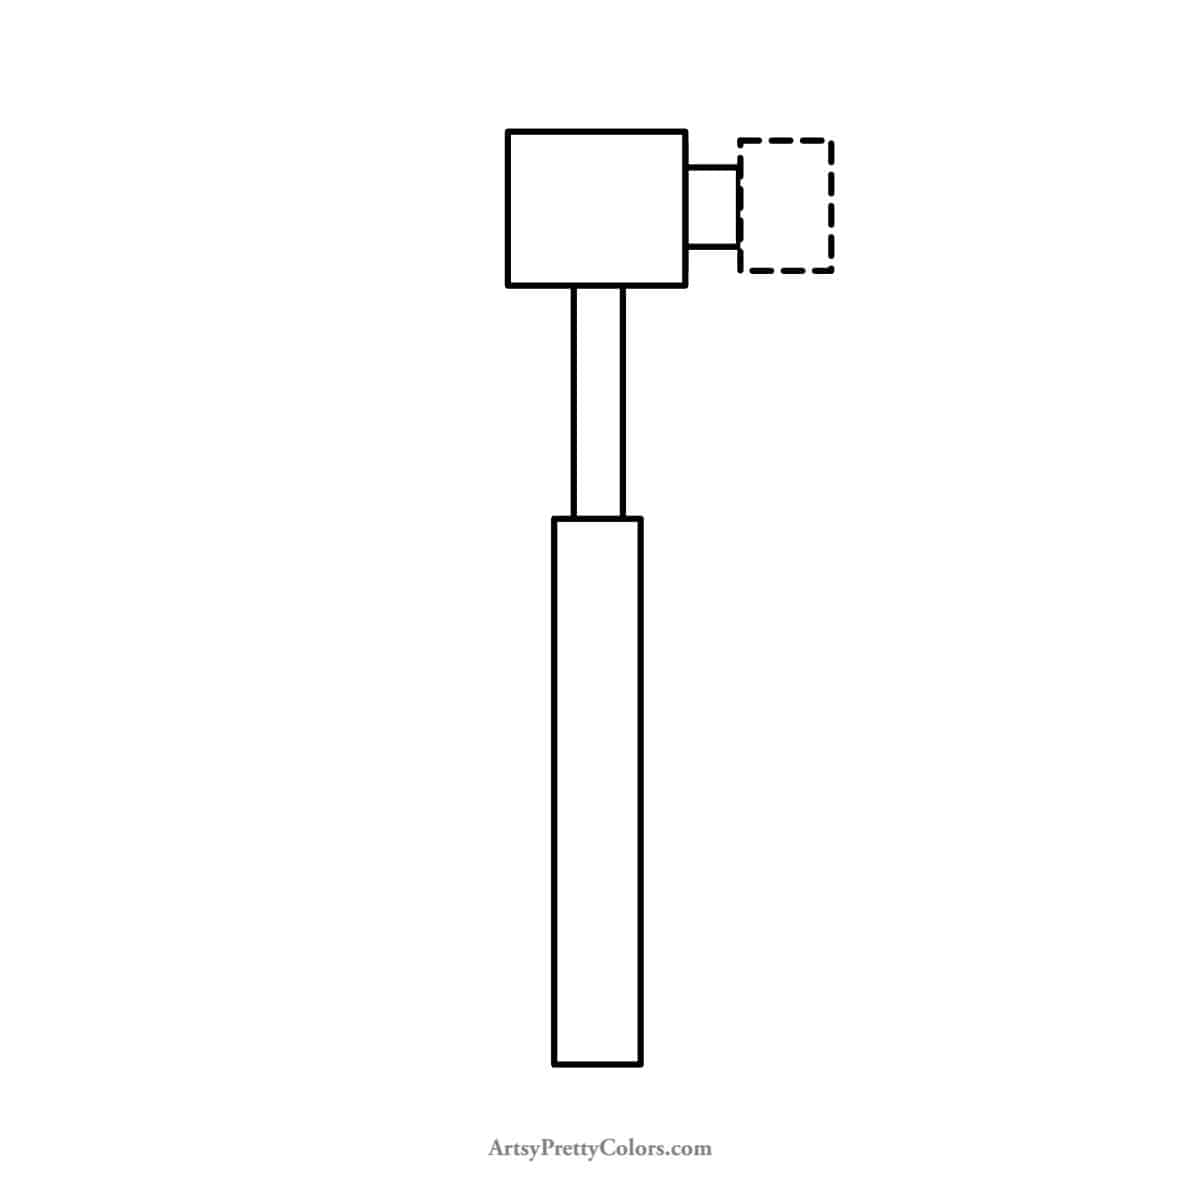
Connect the neck to a larger rectangle. This is the face of the hammer, the part that meets the nail!
Step 6. Draw The Claw

Hammers have a special part called the “peen” for pulling out nails. It looks a bit like a claw.
Draw two smooth curves extending from the head’s base to form this shape.
Step 7. Smooth Out The Handle

Let’s make our handle look even cooler by adding some gentle curves at the top and bottom of the metal part, and where the handle meets the neck.
Step 8. Clean Up Any Extra Lines

Erase any lines inside the areas where you’ve added curves to keep your hammer looking sharp.
Step 9. Add Your Magic Touch
Now for the grand finale! Add some awesome details like wood grain on the handle.
Feel free to color your hammer, shade it, or even place it in a scene like hanging on a tool belt or next to a toolbox.
Remember, the most important part is to have fun and let your creativity shine!
How To Draw A Hammer Step By Step
A tutorial for learning how to draw a hammer. This fun, step by step guide shows the easy way to make a hammer drawing just using basic shapes.
Materials
- Sheet of paper
- Pencil
- Eraser
- Pencil sharpener
Tools
- Please see the full materials list above the tutorial for details and links.
Instructions
- Draw A rectangle To Make The Handle
- Make The Top Of The Handle With Parallel Lines
- Add A rectangle On Top For The Head
- Draw The Neck Of The Head Next To The Head’s Base
- Make The Face of The Hammer Attached To The Neck As A Medium-sized Rectangle
- Draw The Claw With Arched Lines At The Back
- Add Curves To The Handle At The Top And Bottom Of The Thinner Portion
- Clean Up Unnecessary Lines In The Drawing
- Optional- Add Final Details To The Hammer
Don’t forget to Pin it for later!
