
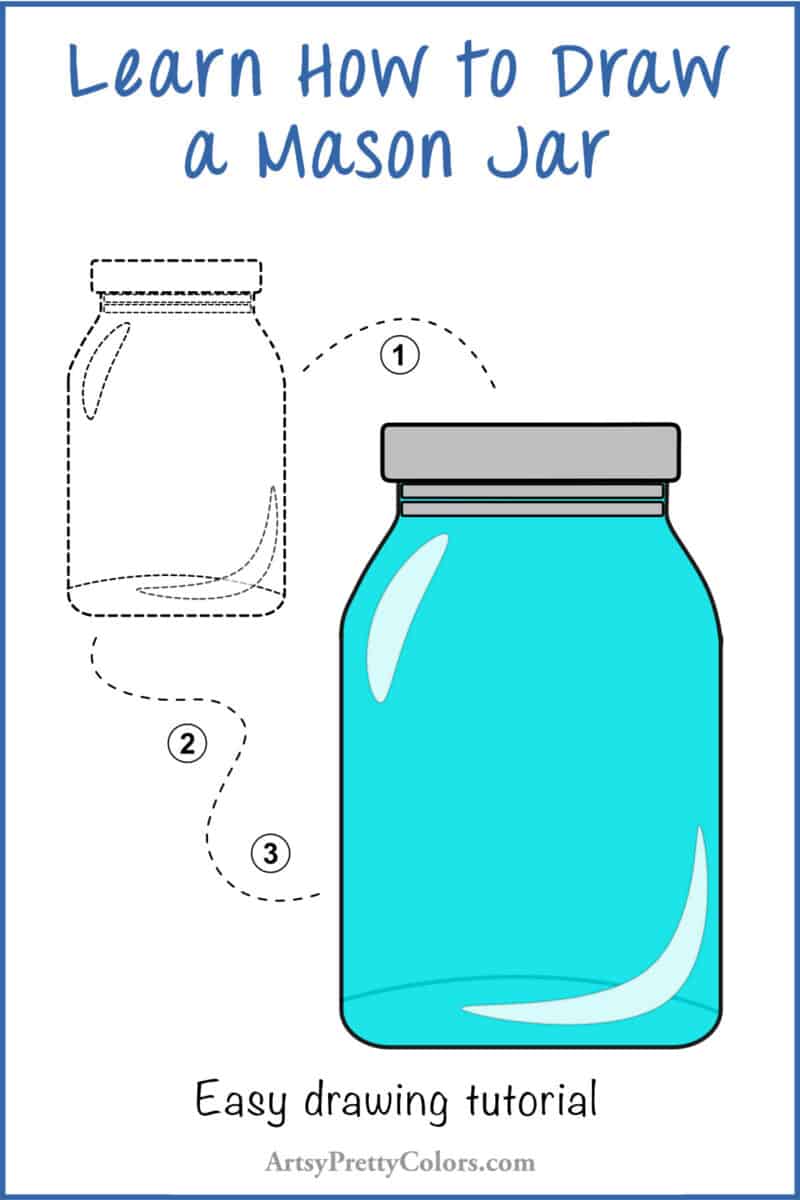
Draw A Jar -Step By Step (Simple and Easy)
How you can effortlessly draw a jar in just six simple steps.
Drawing is easy when you break an object down into basic shapes.
We’ve divided these shapes into simple steps so that you can quickly become an expert at drawing jars.
While there are many types of jars out there, we think a Mason Jar like this one is perfect for practicing your drawing skills.

For more easy drawing tutorials, be sure to check out our guides on drawing a cool shirt, a golden key, and an electrified lightning bolt.
Now, let’s get started on your jar. Grab your supplies and let’s begin!
Drawing Supplies You’ll Need
- Sheet of paper
- Pencil
- Eraser
- Pencil sharpener
Optional Materials
- Colored pencils
- Crayons
- Markers
Step-By-Step Instructions For How To Draw A Jar

Step 1. Draw The Sides And Bottom Of The Jar
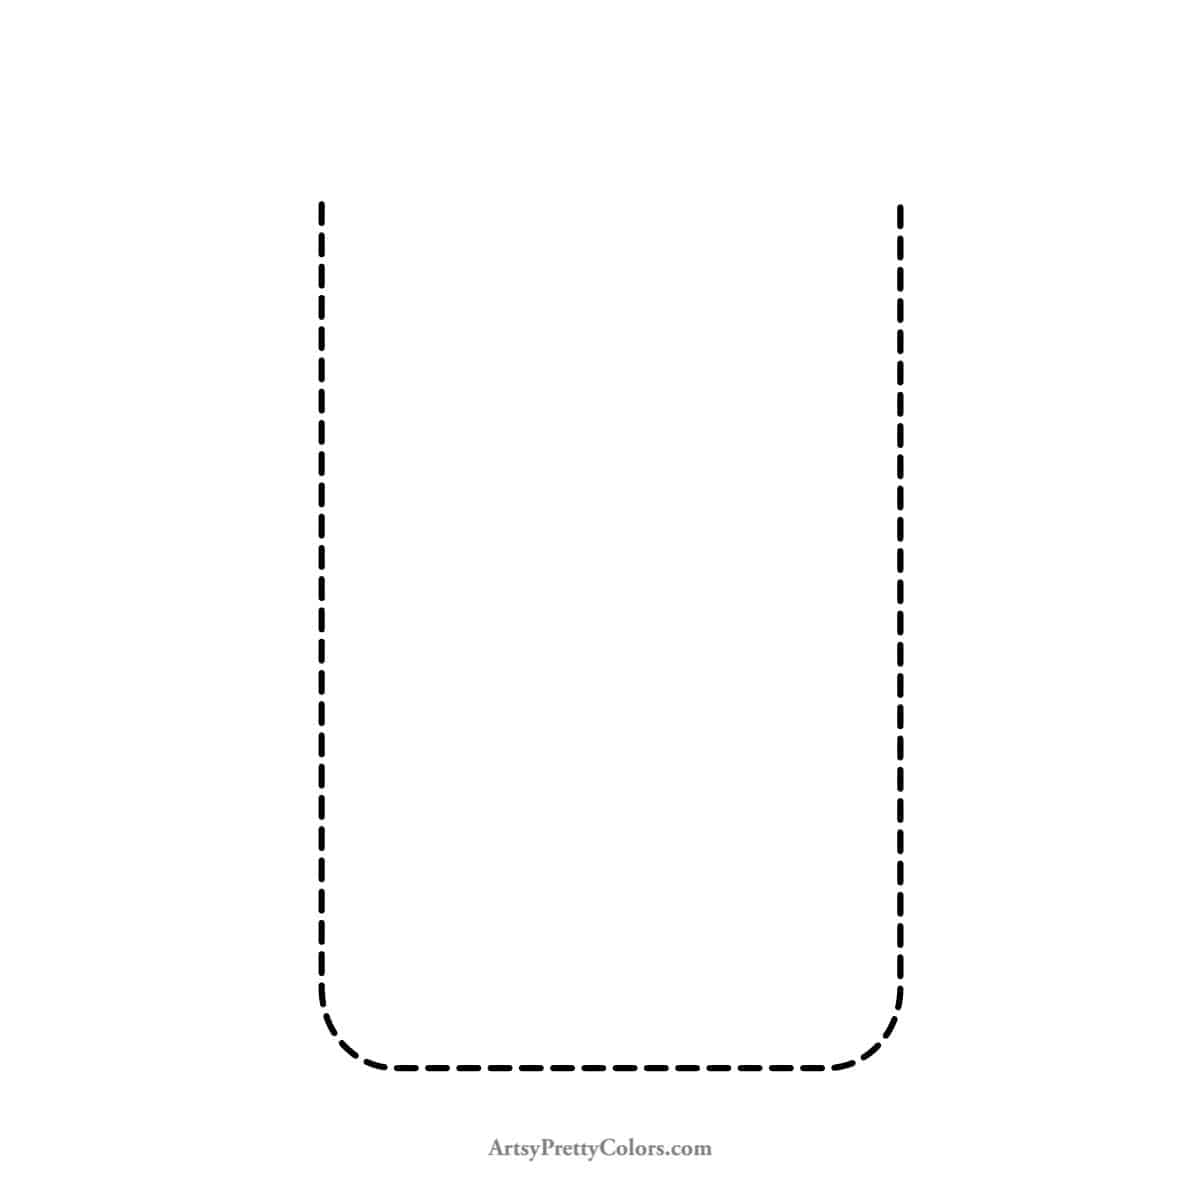
Begin by drawing two vertical lines to represent the sides of the jar. Then, draw a horizontal line across the bottom, curving the ends upward to create the long sides.
Step 2. Add The Lid

At the top of the jar, draw a rectangular lid. Make sure it’s centered between the sides and slightly narrower than the width of the jar.
Step 3. Connect The Sides To The Lid

From the lid, draw two short lines downward just inside the rectangle. Then, connect these lines to the sides with diagonal lines.
Step 4. Clean up The Lines

Erase any unnecessary lines on the sides of the jar to tidy up your drawing.
Step 5. Draw Threads For The Lid

On the neck of the bottle, draw thin rectangles for the lid threads. Curve the short ends slightly for a realistic look.
Step 6. Draw The Reflections On The Glass
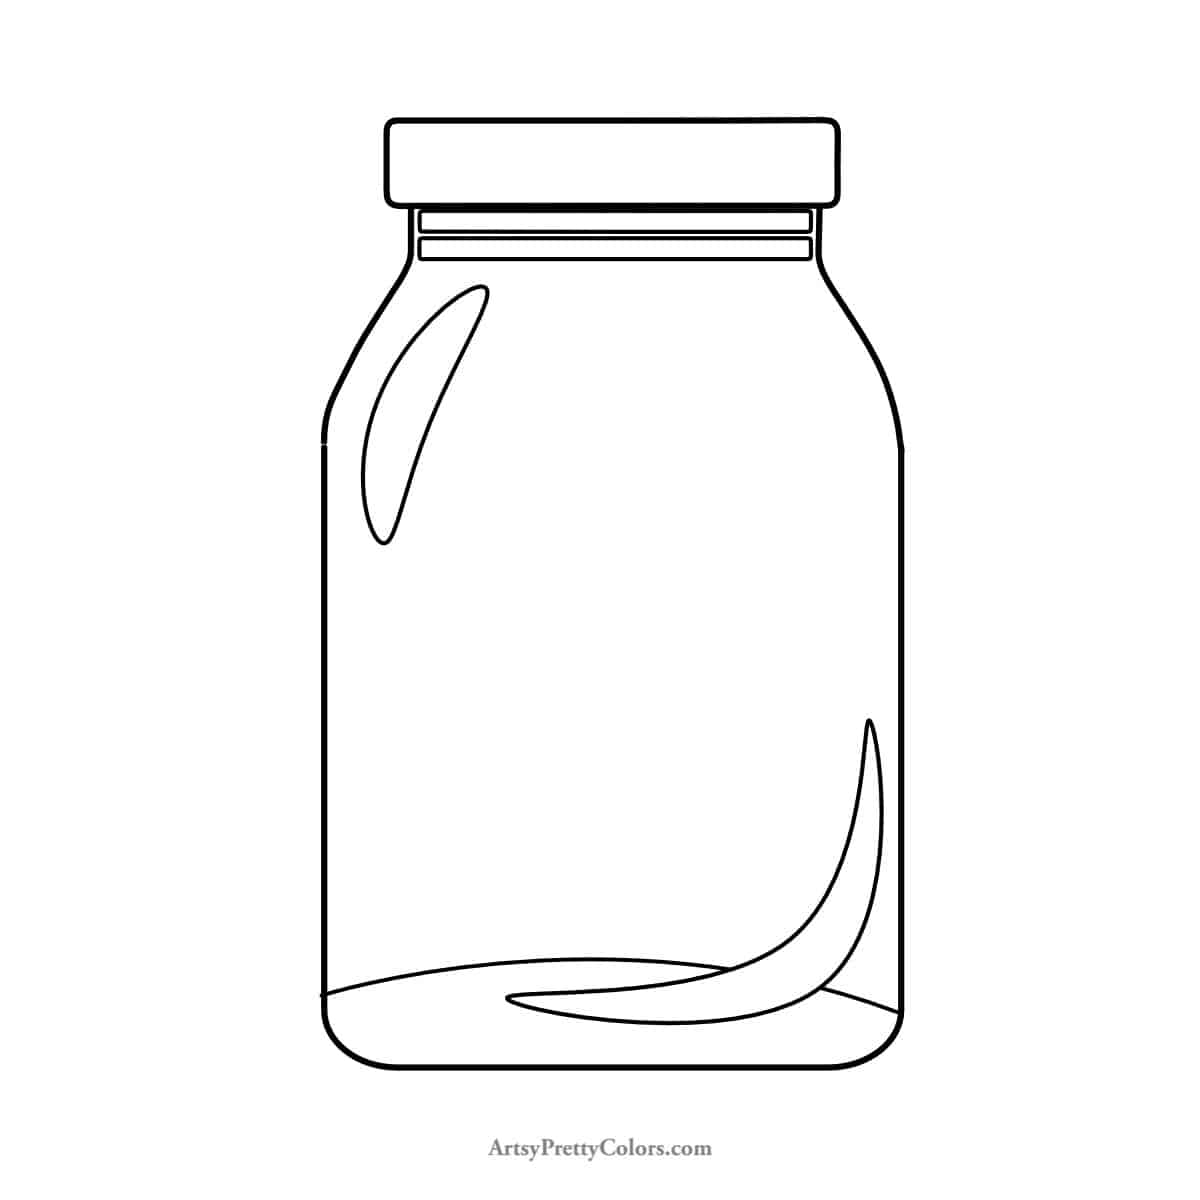
To add realism to your jar, draw a crescent shape at the bottom extending up about halfway. Then, draw a smaller oval shape on the top left side.
Step 7. Optional- Add The Jar’s Final Details And Color It
For a finishing touch, you can add color to your jar. Our reference image shows a greenish-blue glass, but feel free to use your imagination.
If you prefer not to color, simply shade in the reflection areas with lighter greys and the threads and lid with darker greys.
And there you have it! Your very own beautifully drawn Mason Jar. If you’re feeling extra creative, you can even draw a banner ribbon on your jar for an extra decorative touch.
Don’t forget to Pin it for later!
Draw A Jar –Step By Step
A tutorial for how to draw a jar. Follow the simple steps to quickly put together a drawing of a cute Mason jar.
Materials
- paper
- pencil
- eraser
- sharpener
Tools
- Please see the full materials list above the tutorial for details and links.
Instructions
- Draw The Sides And Bottom Of The Jar With Straight Lines Across And Down
- Add The Lid By Drawing A Rectangle
- Connect The Sides To The Lid With Two Curves And Diagonal Lines
- Erase The Leftover Lines From The Sides
- Draw Threads For The Lid Which Are Thin Rectangles
- Draw The Reflections In The Glass As Two Crescent Shapes
- Optional- Add Final Details And Color In The Jar