
Simple Guide On How To Draw A Shirt In 6 Easy Steps
In this step-by-step tutorial where you’ll master the art of drawing a cute shirt in six easy steps.
While drawing a tee shirt might seem straightforward, clothing can pose challenges due to its waves and curves.
It’s less geometric than some of the shapes we’ve tackled in previous lessons, but fear not!
We’re here to guide you through by breaking down the shirt into basic shapes for each step.

Afterward, we’ll add those essential curves to bring your shirt to life.
Ready to enhance your drawing skills? Be sure to check out this article on how to practice drawing.
After we dive into the tutorial, here are some other items you might want to try drawing: a Santa hat, a cool alarm clock, a fun key, and a Mason jar.
Now, let’s gather your supplies and begin your shirt-drawing adventure.
Drawing Supplies You’ll Need
- Sheet of paper
- Pencil
- Eraser
- Pencil sharpener
Optional Materials
- Crayons
- Markers
- Colored pencils
Step-By-Step Guide For How To Draw A Shirt
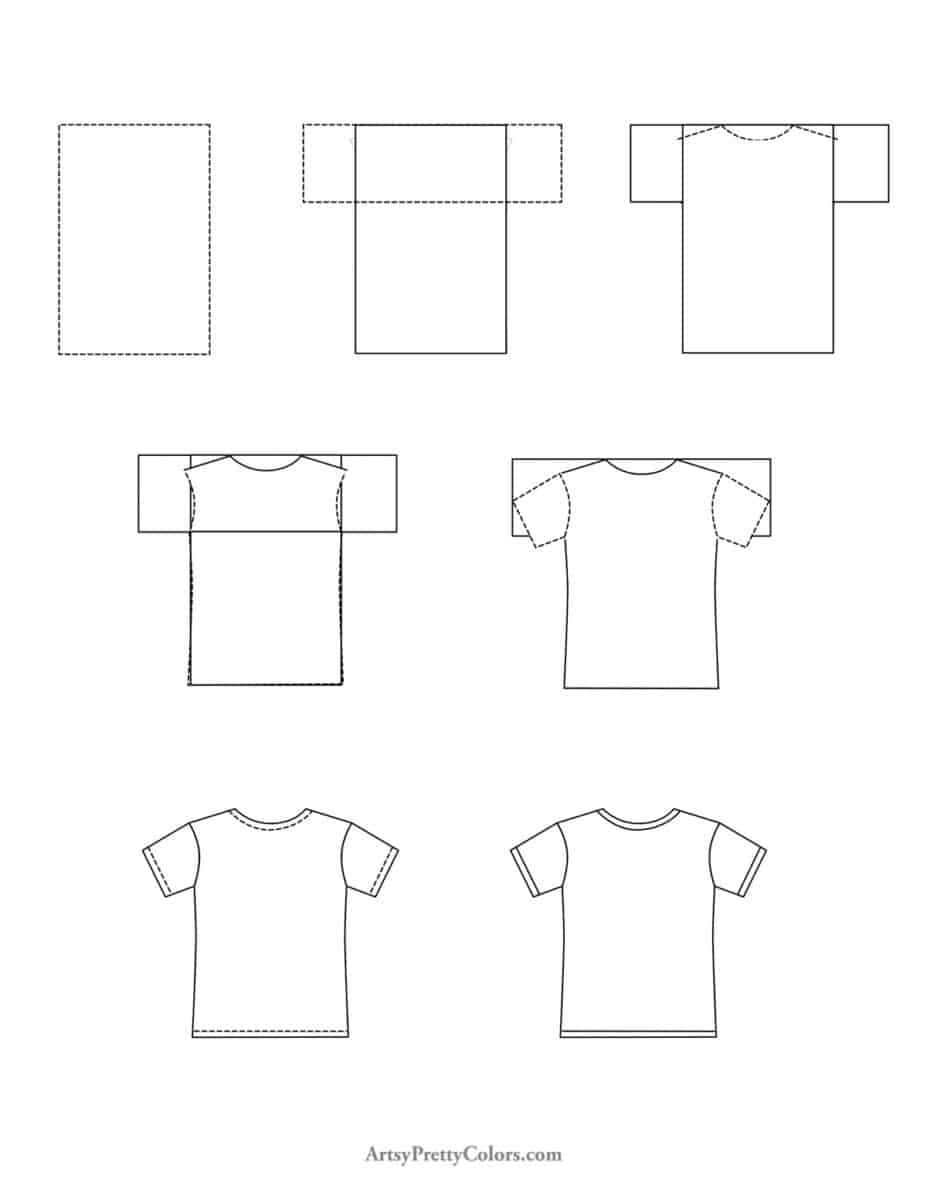
Step 1. Draw The Shirt’s Body Shape

In the first step, start by drawing a rectangle.
Step 2. Add The Shape For the Arms

Now, draw another small rectangle across the top of the previous one.
This shapes the top of the shirt and provides its overall form.
Step 3. Create The Collar And Shoulders
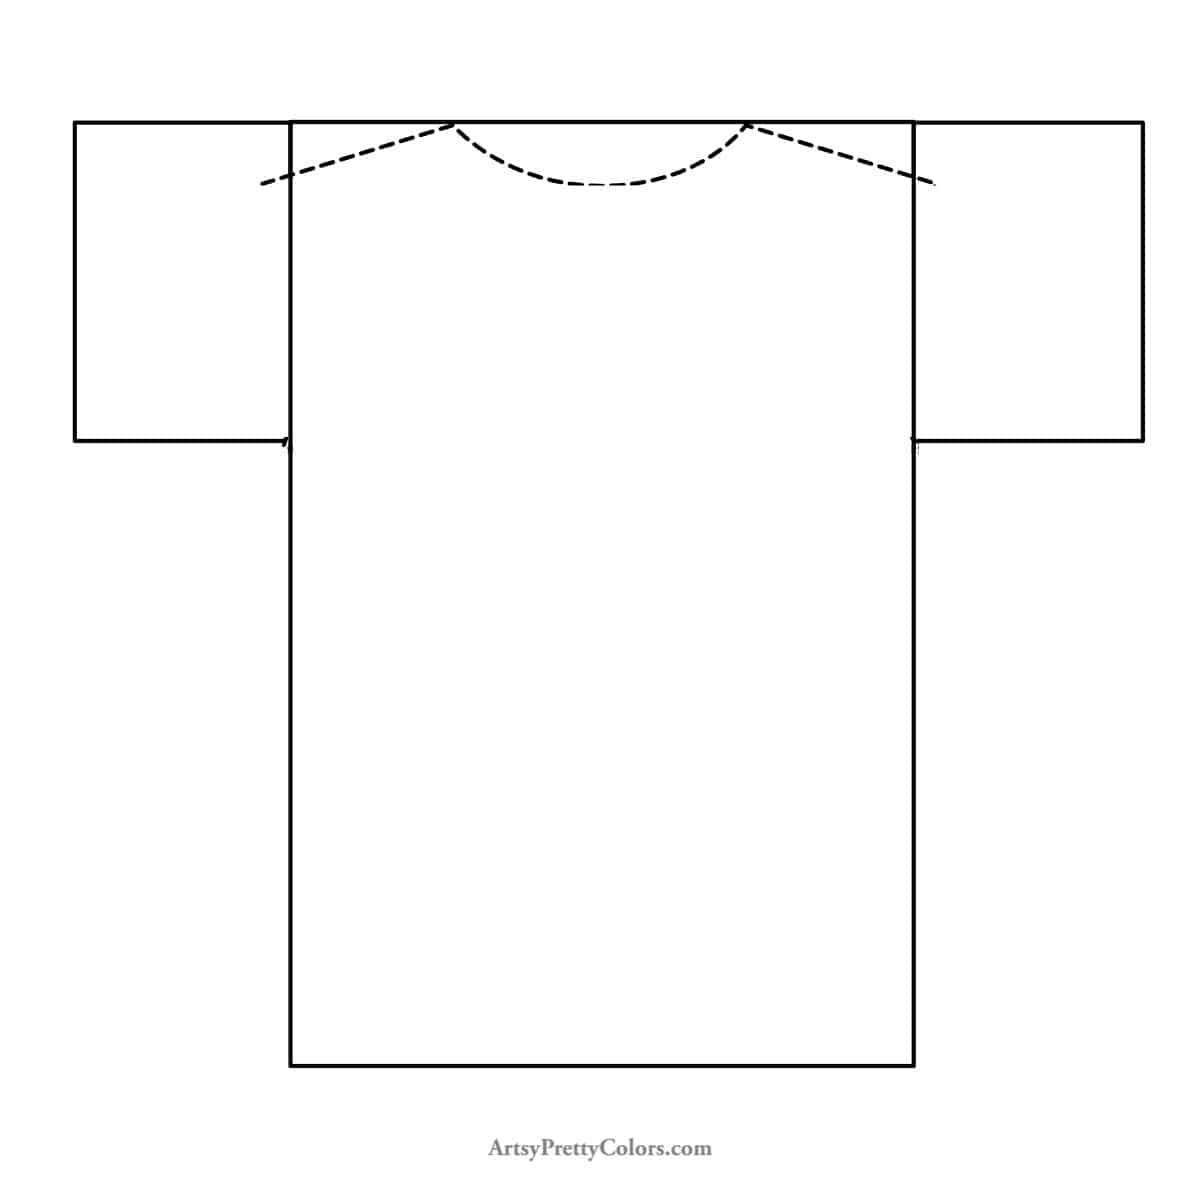
Begin by erasing the bottom line of the top rectangle. Next, draw a curved line down the center to create the collar of your shirt.
Additionally, draw two diagonal lines for the shoulders, angling slightly beyond the horizontal lines of the rectangle.
Step 4. Draw The Sleeves

To create holes for the sleeves, draw a curved line from where the rectangles intersect at the bottom, extending up to the shoulder line.
To add a natural touch, introduce a slightly wavy line along the sides of the shirt’s body, with the lines flaring out slightly at the bottom.
Step 5. Add The Arms

Erase the straight lines from the sides of the long rectangle to emphasize the shirt’s natural curves.
Now, add a diagonal line extending from the top shoulder to the end of the triangle, but at a slightly deeper angle than the shoulder line.
Then, create a short diagonal line with a shallower angle at the top of the shirt’s sleeve.
Finally, connect these lines with a straight line. Repeat this process for the other sleeve.
Step 6. Make The Seams For The Cuffs

To make the seams, follow the shirt’s outline and draw a line just slightly inside each opening.
Step 7. Add Final Details – Optional
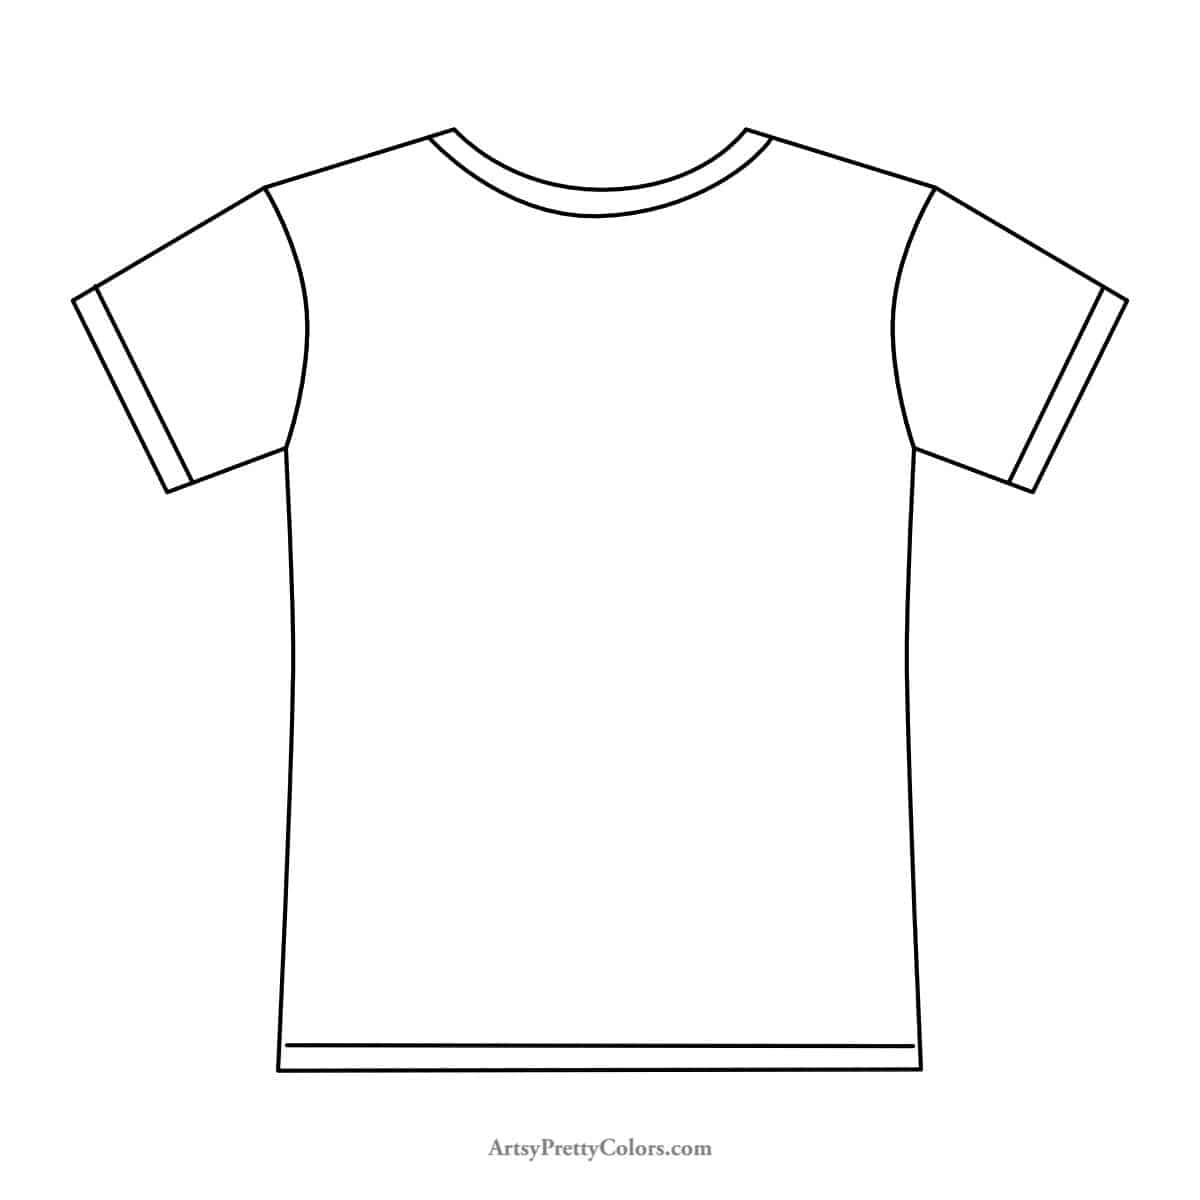
Feel free to customize your shirt by choosing any color you like. You can even add a pocket or a fun graphic to make it uniquely yours.
Congratulations! You’ve successfully drawn a stylish shirt in six simple steps.
Keep practicing, and soon you’ll be drawing various clothing items with ease.
Don’t forget to Pin it for later!

How To Draw A Shirt Step By Step
Draw a shirt the easy way. Follow our simple step by step guide for making a basic drawing of a tee shirt. A first step in learning how to draw clothes.
Materials
- piece of paper
- pencil
- pencil sharpener
- eraser
Tools
- Please see the full materials list above the tutorial for details and links.
Instructions
- Draw The Body Shape For The Shirt
- Add The Shape For the Arms
- Create The Curve For The Collar
- Draw The Holes For The Sleeves
- Add The Arms
- Make The Seams For The Cuffs
- Add Final Details - Optional