
How To Draw A Half Moon Step By Step
Here’s our straightforward guide on how to draw a half moon. This guide is specifically designed for young adults and beginners. Still, it’s equally engaging for anyone who loves objects in the sky.
Whether you’re a budding artist or a seasoned sketcher, drawing a moon may seem daunting initially.
However, this tutorial simplifies the moon drawing process, breaking it into manageable shapes.
In this lesson, we focus on the waning crescent moon, a fascinating phase in the lunar cycle.
The waning crescent, which we’re sketching, showcases the moon’s face angled to the right. This is the opposite of its counterpart, the waxing crescent facing left.
Check out our other drawing tutorials on whimsical subjects like a simple yet charming mushroom, a futuristic spaceship, or a dynamic lightning bolt.
Drawing Supplies You’ll Need
- Pencil
- Paper
- Eraser
- Pencil sharpener
Optional Enhancements
- Colored pencils
- Markers
- Crayons
Step-By-Step Guide For How To Draw A Half Moon

Step 1. Draw A Full Moon Outline

The first step is to simply draw a circle. Of course, you don’t need a perfect circle, but if you want to make it completely circular, you can use a small glass to trace around.
Step 2. Create The Crescent Shape

Since we aren’t drawing a full moon, we need to turn it into a crescent moon shape.
To do this, you’ll draw a second circle that overlaps the first one. To help with positioning, we’ve provided a straight grey line to help you see better where the position of the 2nd circle is.
The second circle is drawn higher than the first circle and connects at the top of the first circle, right in the middle.
Step 3. Clean Up The Pencil Lines

Next, erase the pencil lines from the second circle you drew in the previous step.
You can see how the overlapping circles gave us such a nice moon shape and an excellent sharp point at each end.
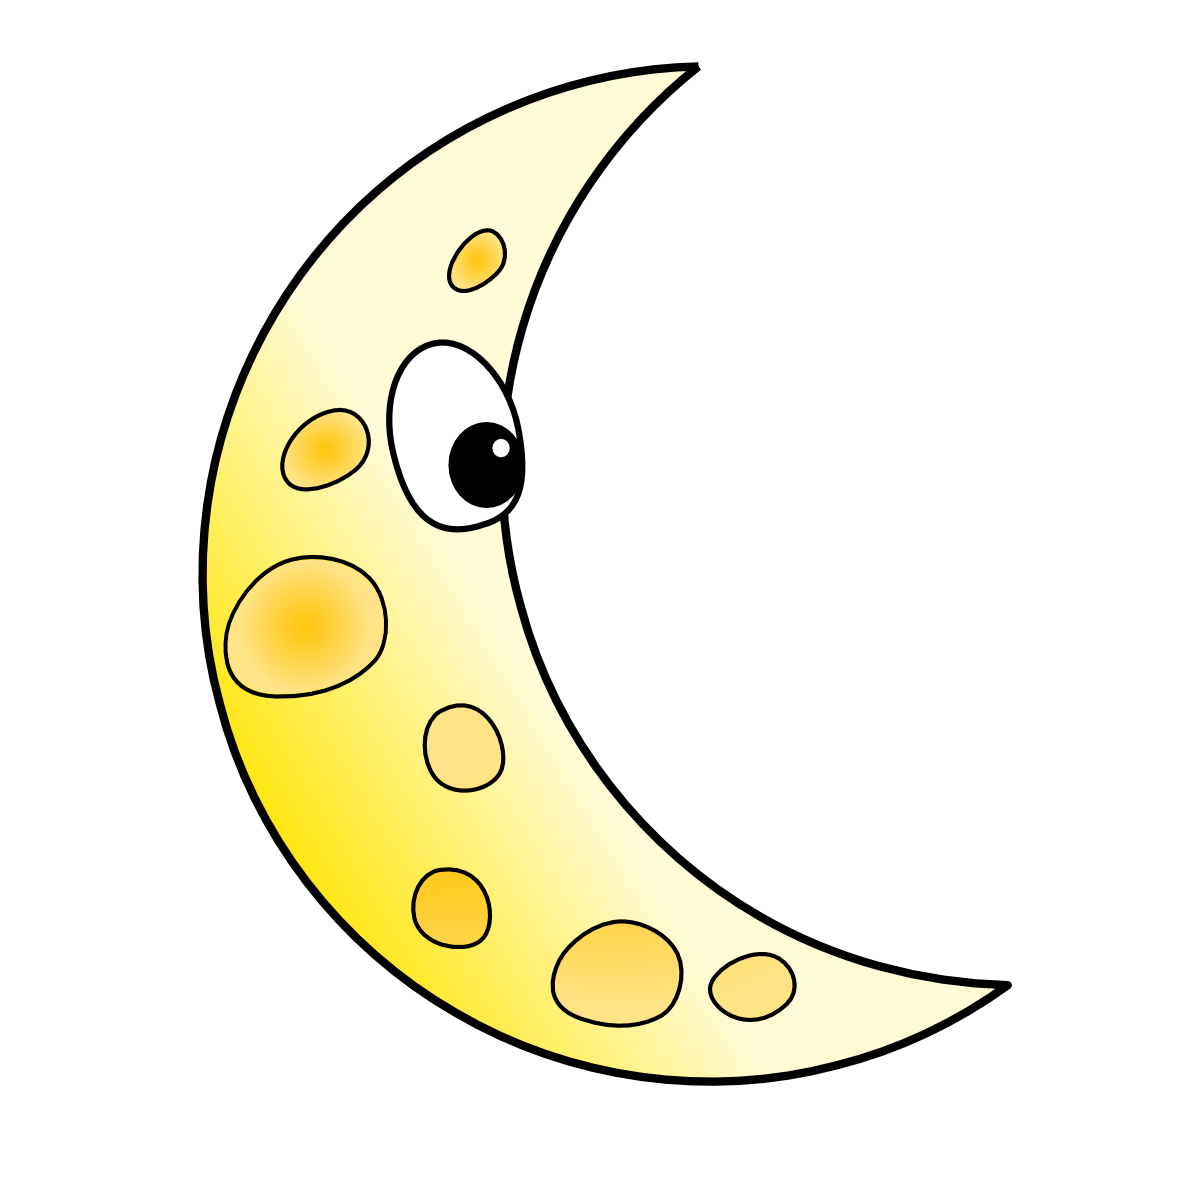
Step 4. Add the Final Details To Your Moon Sketch

Now for the final touches, add the craters to the moon. These can be circular, oval, or irregular-shaped ovals placed on the side of the moon.
Next, add the eye. Draw an oval and place it near the inside edge.
Add a small circle for the pupil, and if you’d like, to make it a cartoon moon, add a white dot in the center of the pupil.
You can draw a whole moon face by adding a nose and mouth.

If you’d like to add color to your moon, think about what background color you’d like to use.
You can make it a dark background to match the night sky or leave it as a white background.
For the moon itself, you can color it white, off-white or yellow. Or choose your favorite colors.
Here’s a fun fact about the moon and astrology. When people ask, “what’s your sign” they are asking which zodiac symbol the sun was in during the time and location you were born.
Your moon sign is based on which zodiac the moon was in, in the location and time you were born.
Don’t forget to Pin it for later!

How To Draw A Half Moon
Here's an easy tutorial for how to draw a half moon in just four steps. Color it in if you'd like for extra details.
Materials
- pencil
- paper
- eraser
- pencil sharpener
Tools
- Please see the full materials list above the tutorial for details and links.
Instructions
- Draw The Moon's Outline
- Create The Crescent Shape
- Clean Up The Pencil Lines
- Add the Final Details To Your Moon Sketch